Hi everyone! I know I said yesterday I wouldn’t be blogging again until I came home from work in two weeks, but it turns out that there is a blizzard at the mine today so I won’t be flying there until tomorrow. Today I have been relaxing (and going through my work email) at my hotel, it is nice to get a very quiet day off! I find when I am at home I am always on the go because there are projects for me to do everywhere. Since I have some quiet downtime I figured I would write up a quick recipe post 🙂
Last week I tried a new recipe for roasted radishes, and they were so good and easy I just had to share! I love radishes but have only ever had them raw in salads and veggie trays. This recipe only requires 4 ingredients and is very simple to make. The resulting roasted radishes are fantastic – they taste peppery and sweet and this will definitely be a recipe I make again!
Roasted radishes: The perfect veggie side dish for spring!
My husband Eric was busy judging beers for 3 nights last week after he finished work so I was on my own for supper. Usually when this happens I go through the random pantry items I have hanging around and make something to use them up. I had some mashed potatoes and shake n bake chicken breading that needed to be used but I wanted a tasty veggie side dish to spice up the somewhat plain meal. When going through the various blogs I read I found this recipe on Toronto blog Living Lou for roasted radishes: http://www.livinglou.com/2016/04/how-to-roast-radishes.html.
To make roasted radishes all you need is the following:
1 bunch of radishes
1 tbsp. extra virgin olive oil
1/2 tsp. sea salt
Freshly cracked pepper to taste
These four simple ingredients are all you need to make roasted radishes.
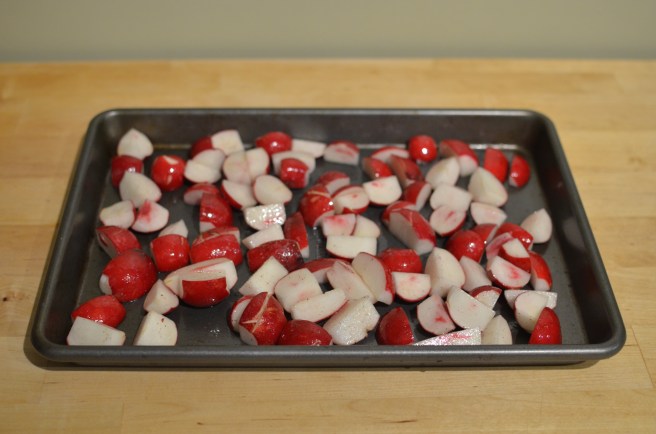
To make the roasted radishes start by preheating the oven to 450°F. Next, wash the radishes and slice off the stalks and any blemishes. Cut each radish into quarters and place them into a medium bowl. Toss them with the olive oil, salt, and pepper. Then place the radishes on a large baking sheet and roast for 15-20 mins, stirring halfway through the cooking time.
Serve the roasted radishes immediately and enjoy! As seen below, the radishes caramelize beautifully and turn a lovely light pink colour. Probably one of the prettiest and tastiest veggie side dishes I have made, and it is very easy too!
Roasted radishes, ready to eat!These roasted radishes immediately perked up my rather tame pantry leftover dinner! This recipe is definitely a keeper!
I hope you will give these roasted radishes a try and that you are all enjoying the lovely spring weather! I have a hot date with the cold Arctic starting tomorrow, but I will be back in two weeks with more cooking, baking, decorating and fashion posts – I’ve got so many posts planned!
Have you ever stood in front of your closet feeling like you have nothing to wear, even though you clearly have a ton of clothes? Or you just wear or buy the same few things over and over? *Rebecca raises her hand sheepishly* Then it is probably time for you to do a wardrobe rehab!
I started my wardrobe rehab last week and I have completed the first phase which is purging the unwanted items (I have also started on the second phase which is filling the wardrobe gaps, more details to come on that). I put a fair bit of time and thought into it, so I thought I would share my process and some good tips. I know for many people (including me!) going through their wardrobe is a big task that can be difficult due to emotional attachment to your clothes as well as fear of getting rid of things you paid good money for.
My motivation to perform a wardrobe rehab comes from several things:
Lack of closet space: Sadly my master bedroom only has one very small closet. So when we moved into the house I told Eric he could have that closet and I would take over the small bedroom next to it with my clothing. That room came with shelving and plenty of hanging storage so I happily put my clothes in there and was quite thrilled with how much room I now had for my wardrobe. Fast forward to today, where my clothing has gotten out of control simply because I have tons of space for it…for now. The top floor of my house has three bedrooms: The master bedroom, my current closet/craft room, and the guest bedroom. Obviously at some point if we have kids I will not be able to keep this room for all my clothes so it is time to reduce the size of my wardrobe.
Too many items: My closet room is now very full, and sadly it is full of items that I rarely wear. This is wasteful and it makes it hard to see what I have properly.
Stuck in a style rut: The last few months I have felt like I was just wearing the same things over and over in the same ways. Sure it was winter, but that is no reason to feel so stuck fashion wise!
Not enough classic pieces: I had a sense that I had many trendy pieces but I was lacking foundational classic pieces -this became very clear once my purge was complete! Getting rid of the unwanted items made it very easy to determine what I would need to rehab my wardrobe.
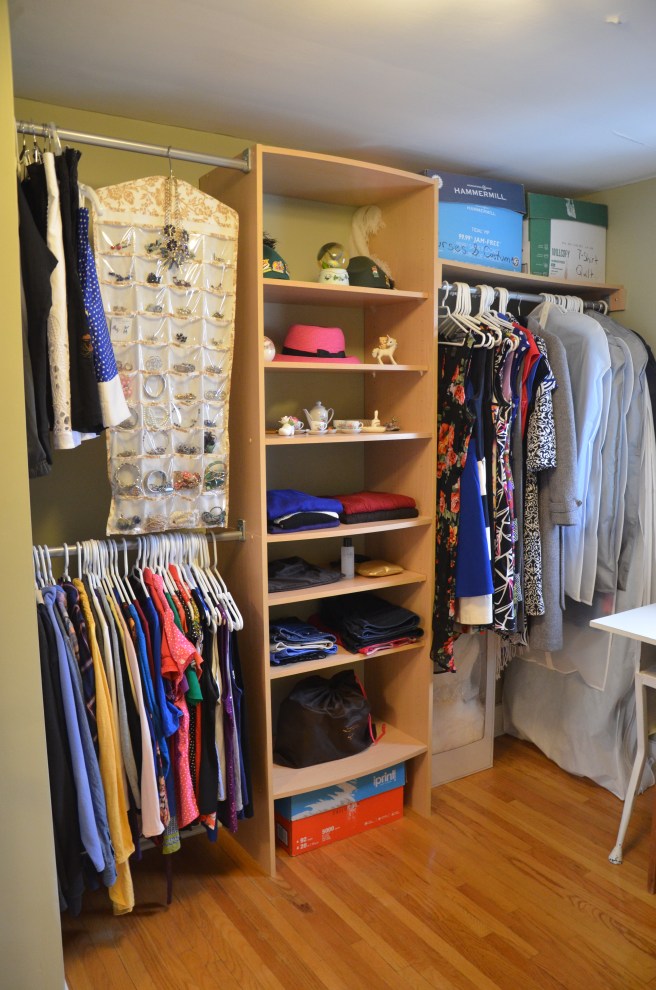
My wardrobe before the purge – it was very full and hard to see what I had! By the way, this room is in it’s original state from when I moved in – that awful green colour is all over the house and I am slowly working at getting rid of it room by room!Another shot before the wardrobe purge; some of these items haven’t been worn since I bought the house two years ago…
I completed my wardrobe purge over several days in manageable chunks. The first day I did all my outerwear, footwear, socks, and intimates. These items are located in the master bedroom and guest room closet and were pretty easy to pare down. The next day I did all my bottoms, jewelry, and items on the shelves (sweaters and shorts). By the third day I had a sizeable pile of items I had purged and it inspired my husband Eric to join in! I had him help me with the hard items – my huge collection of tops and dresses. Then I helped him purge his wardrobe.
Tips for wardrobe purging:
If possible have a close friend/partner/family member around so you can try on things for them and get their thoughts. I did the hardest parts of my wardrobe purge with Eric around and it really helped me out – he had a lot of insight and was good at helping me to let go of things that just didn’t work for me anymore.
When deciding to purge something always ask yourself the following questions: Is it comfortable? Does it fit? Is it something I will wear again? If the answer was no to any of these questions I would purge the item.
Donate the purged items that are in good shape; I tend to donate to Value Village since they give you coupons for your next purchase (and you all know how much I love thrifting!)
While going through your wardrobe take the time to try on each piece; this will give you a much better idea if it is something that you should purge or not.
Examine all your pieces to check if they need any repair, alterations, or cleaning – now is the time to get the items you will keep in top shape so you actually wear them!
While purging be thinking about what your style is; knowing what direction you want or need your wardrobe to go in will help you sort out what you need to keep (or buy!) to get it there.
Once I finished purging my wardrobe I had two entirely filled garbage bags to donate! It was frightening how much I had held onto for no reason. Eric also had two entirely filled garbage bags to donate from his wardrobe. Since the items were in good shape I donated them to Value Village.
My pile of purged items entirely filled two whole garbage bags!
The hardest items for me (and Eric) to purge were the sentimental ones – university event t-shirts and other t-shirts from our travels. We weren’t wearing these items anymore, just storing them all over our valuable closet spaces. What we decided was that we could have one small box for items we just couldn’t part with yet, which I am now calling the Sentimental Box (patent pending lol). We were able to get rid of all the less sentimental items with ease once we decided we could only have one box worth of those kinds of clothes.
The single most difficult item I purged was my university graduation ball dress; it had a lot of sentimental value, cost a fair bit when I bought it, and it still fit me. But I realized I would never have an occasion to wear it again, and even if I did somehow have an event to wear it to it wasn’t my style anymore and didn’t fit perfectly. Plus I recalled finding my high school prom dress at a thrift store and realized I could be giving it to someone who really needed it. So I donated it to Value Village with the rest of my purged items after trying it on one last time.
My university graduation ball dress was the most difficult item to purge from my wardrobe; I hope that someone who needs it will give it another time to shine!
Once I was done with my wardrobe purge it felt pretty good – I could now easily see what I had and I had more space free. This allowed me to display my purses so I can switch between them easier (plus it looks so much cuter!). Doing the purge told me I had a ton of patterned pieces, but very few neutral foundational pieces. Also I only had two pairs of pants, but 20 tops! This helped me to form a wardrobe shopping list, along with a few articles online about the classic pieces a woman’s wardrobe should have (spoiler alert: I’m missing most of them lol). I then moved into Phase 2 of my wardrobe rehab: the rebuliding. As you can imagine, this step involves a lot of shopping and I will be writing about it in Part 2 of my wardrobe rehab post so stay tuned!
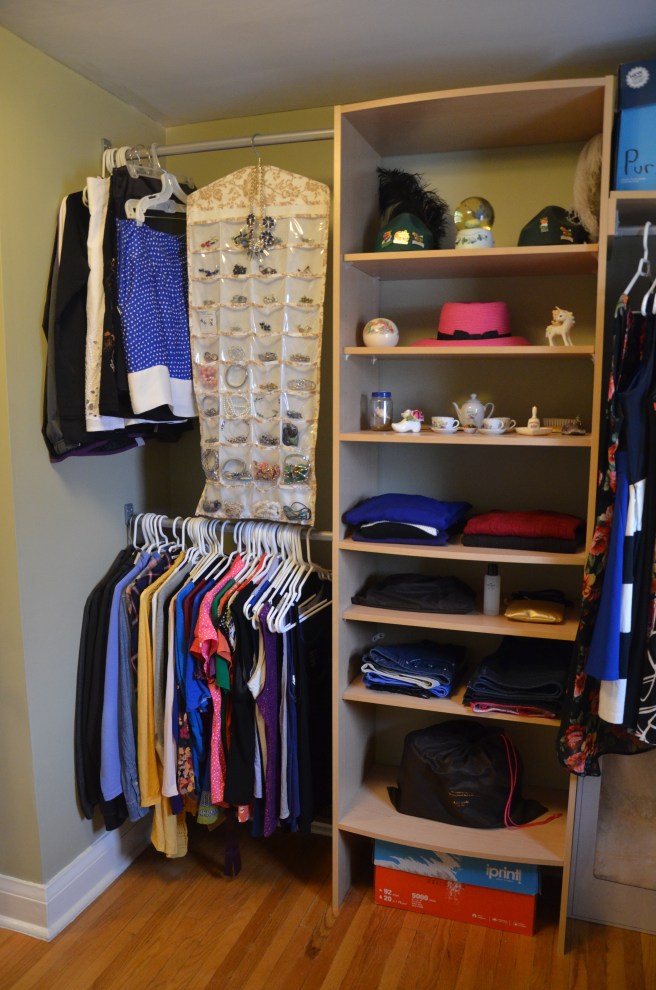
My wardrobe after completing my purge – it is much more functional and easy to see what I have!
I hope that this post has inspired you to do your own wardrobe purge, and if you do a wardrobe purge let me know how it goes! Time for me to head back up to work, I will have more blog posts when I get back home in two weeks!
Happy (almost) spring everyone! It’s finally starting to warm up and I have been so busy since I came back from work last week – lots of big projects I have been working on and will be posting about soon (home decor and fashion related)! I have also been cooking up a storm lately and I thought I would share a great new recipe I found for maple granola with you all.
So a confession; breakfast is my favourite meal of the day! Sadly I don’t eat eggs and so I find it hard to find a tasty, filling breakfast that is easy to prepare, especially on weekdays. However, I was reading my favourite home decor blog (The Inspired Room at http://theinspiredroom.net/) and came across a very simple recipe for homemade maple granola. You can make it ahead of time in big batches and it keeps for weeks in an airtight container; this really works for me and Eric since we are always in a rush on weekday mornings (him to head to work, me to watch Ellen lol). The maple granola turned out to be very good and perfect to use with yogurt, fresh fruits, or milk. I also think I may use it in the future to mix with nuts and dry fruit as a tasty trail mix snack!
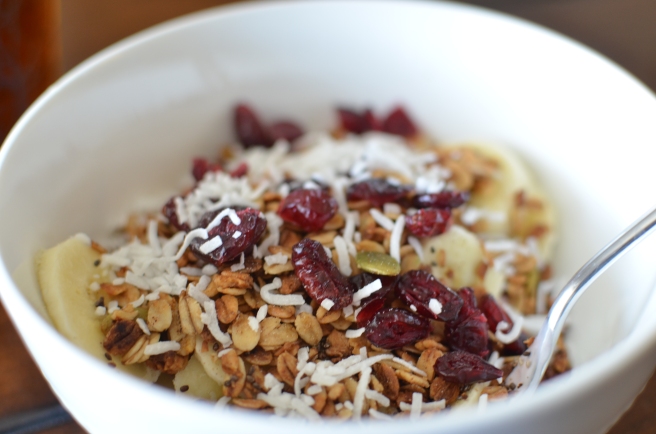
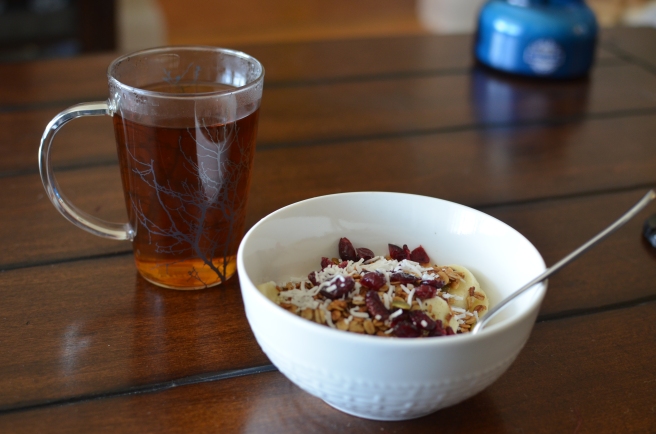
Maple granola breakfast bowl: I added shredded coconut, Greek yogurt, sliced banana, and dried cranberries to the granola – so tasty and satisfying!
1/4 cup melted coconut oil (protip: for cheaper coconut oil head to the international foods section since that is where all the non-hipster coconut oil hangs out; my jar was only $2.50 and will last for at least two double batches of this recipe)
1/3 cup maple syrup
1/2 tsp. cinnamon
1/4 tsp. sea salt.
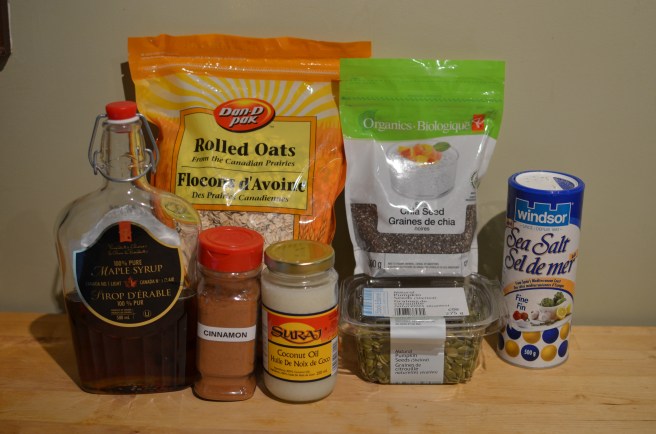
Everything you need to make delicious homemade granola.
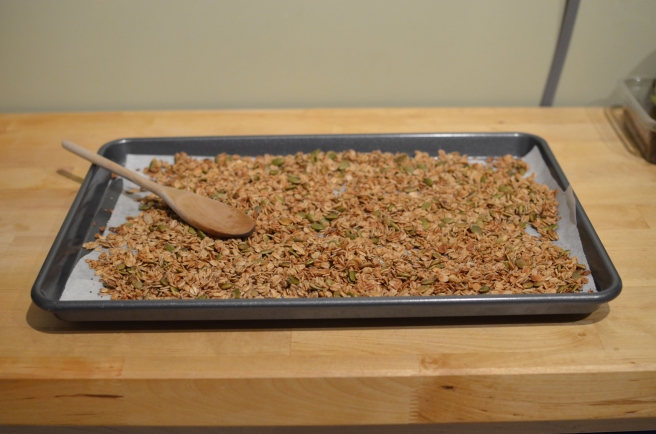
To make the maple granola start by preheating your oven to 300°F and lining a large baking sheet with parchment paper (if you are doing a double batch line two baking sheets). In a large bowl stir together the following dry ingredients: rolled oats, pumpkin seeds, and chia seeds. In a medium bowl combine the coconut oil, maple syrup, sea salt, and cinnamon. Next, combine the contents of the medium bowl with the contents of the large bowl. Then spread the mixture evenly on the baking sheet. Bake for 20 minutes then give the granola a stir and bake for another 15 minutes (or until the granola is golden brown). Remove from the oven and let the granola cool before storing it in an airtight container.
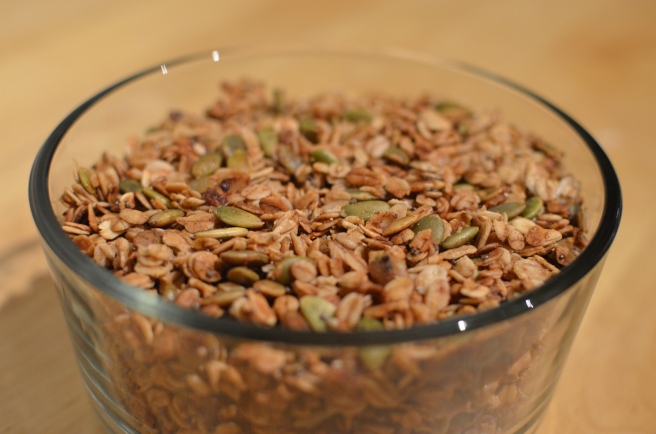
Granola for days! Bonus, baking this will make your home smell delicious!
My favourite thing about this granola is how filling it is – I wasn’t hungry until way after my usual lunch hour. Eric said the same thing so this recipe is a winner! Also it is nice to eat something so real without any preservatives or loaded with sugar. Finally, this recipe is super easy and something you can just toss in the oven while you do something else nearby. I hope you will give it a try and let me know what you think.
Happy weekend everyone; I hope you will all enjoy the amazing weather that has finally arrived!
Now that’s a perfect weekday breakfast: Easy and quick to make, tasty, and very satisfying!