Cooking: Crispy Potato Nests Poutine with Tikka Masala Gravy

When I’m out and about with Eric at bars on the weekend we always crave the snack food bars sell – poutine, nachos, fries, etc. These are all delicious fried foods that can be tricky to make at home. But last weekend I think I finally cracked the code on how to make amazing, easy to make bar food at home – so today I will be going over my recipe for my decadent crispy potato nests poutine with tikka masala gravy!!! Warning: This is not a healthy recipe and it is almost too easy to make!

Last weekend Eric and I had his cousin and her husband over for a night of hanging out and delicious food. I decided we would need an excellent barfood inspired snack to keep us going long into the night. We did all the prep work in advance so it would be easy (even after a few drinks) to put the poutines together. However; we all ate so much at Rodeo Brazilian Steakhouse that night (http://www.rodeobraziliansteakhouse.com/, it was amazing food that I will crave for months to come) that we didn’t eat the poutine until the next day. And by eat it the next day I mean that instead of the hashbrowns I planned we ate tikka masala poutine for breakfast (it was delightfully naughty)!

DSC_4266
Crispy potato nests poutine with tikka masala gravy – even just looking at this picture makes me want to make it again!

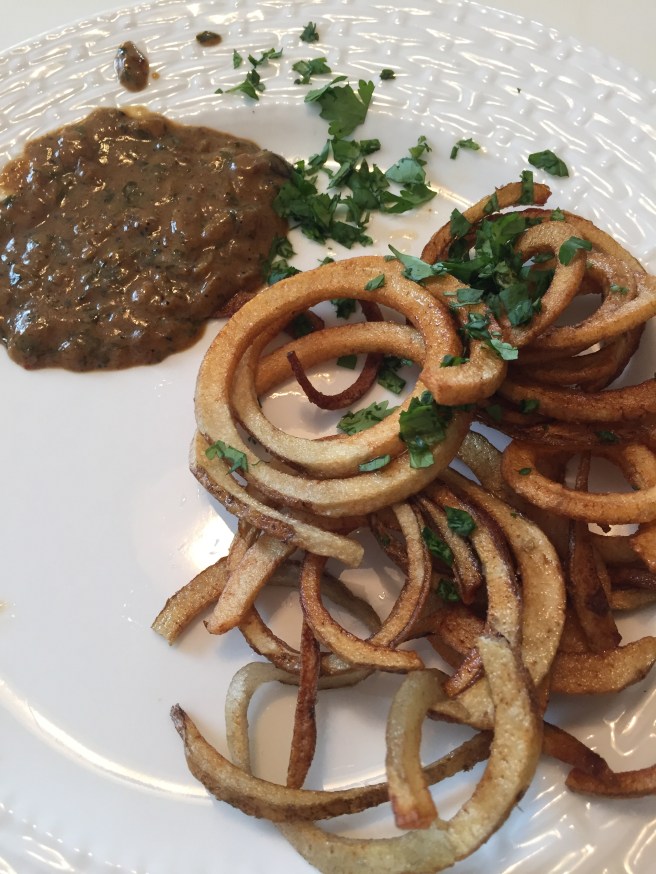
This poutine is mouthwatering and decadent – it has a base of crispy potato nests smothered with a flavorful tikka masala gravy and squeaky, melty, cheese curds. We also topped the poutines with fresh cilantro. It is definitely one of the tastiest dishes we have ever made at home – if Eric and I ever do open a brewpub or bar this would go on the menu for sure!

I’m going to start with discussing the crispy potato nests. I was inspired to try this recipe when I was watching the show Giada Entertains (Food Network) where she made thin, curly, crispy fries using a sprializer. The recipe is this one: (http://www.foodnetwork.com/recipes/giada-de-laurentiis/crispy-potato-nests-with-cherry-ketchup.html?soc=socialsharingpinterest), but I omitted making the cherry ketchup and adding cinnamon to my potato nests.

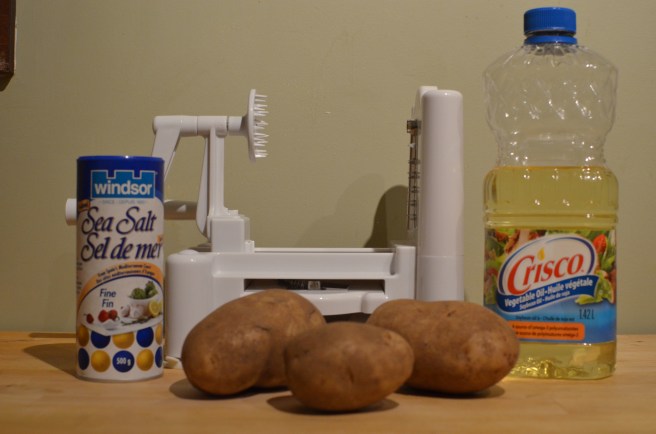
The specialized equipment you need for this recipe is a deep fry thermometer (or candy thermometer) and a sprializer. However, I think this recipe could be done without a spiralizer if you are going for more of a regular french fry shape and if you have the patience to cut the potatoes. Definitely the skinnier your potatoes are cut the crispier they will get when you fry them. We used a thermapen thermometer that Eric has for brewing and it was perfect for this since it has an instant digital readout (http://www.thermoworks.com/products/thermapen/). Ingredient wise this is an amazingly simple recipe: Russet potatoes, vegetable oil (enough to fill your pot 3 inches deep), and salt.

DSC_4357
What you need to make crispy potato nests at home (not pictured, deep fry thermometer)

To make the potato nests first heat the oil in a pot over medium-high heat until it reaches 350°F on the deep fry thermometer. Please be careful when working with the hot oil and keep in mind that many insurance policies don’t cover fires caused by deep frying. Next, using the medium-thick blade on a spiralizer, cut the potatoes into thin spirals. We actually spiralized the potatoes in advance, just remember to store the spiralized potatoes in water so they don’t turn black due to oxidation.

DSC_4262
Frying the potato nests

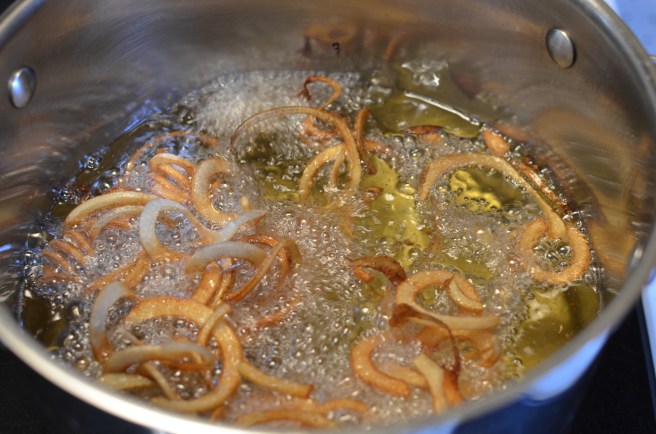
In small batches fry the potatoes, turning them as needed so they brown and crisp up evenly. They are done when they are lightly golden and crispy, which takes about 1 to 2 minutes. Remove the potato nests to a paper towel-lined plate, dab gently with paper towels to remove excess oil, and then sprinkle with salt to taste. Serve immediately. Ensure the oil is always above 350°F before you put in more batches of potatoes; otherwise your temperature may be too low and your potatoes will not fry.

DSC_4263
Be sure to dab the excess oil off and sprinkle with salt

These fries were amazing and I can definitely see Eric and I making them again; they were crispy and tasted like fries you would get at an upscale bar. They were also very easy to make! They were excellent on their own and definitely did not need to be made into poutine…but I had a recipe for tikka masala gravy to put on fries that was begging to be part of a poutine!

One of our most unique wedding gifts was a subscription to a spice of the month club called Spice Post. Spice Post sends you two spice mixes a month along with several recipes that use the spice mixes. We have loved discovering new flavours and recipes, and this recipe for tikka masala gravy is probably our favourite one yet! Best of all, you don’t need to have the Spice Post tikka masala spice mix we used – any tikka masala spice mix will work in this recipe.

DSC_4362
Spice Post tikka masala spice mix and recipe card

To make the tikka masala gravy you will need:

  • vegetable oil
  • 1 large chopped onion
  • 1 minced chili (if you want to add some heat)
  • 2 tsp. flour
  • 2 tbsp. tikka masala spice mix (our mix was from Spice Post but other mixes would work well too)
  • 8 oz. chicken stock
  • 8 oz. coconut milk
  • Juice of half a lemon
  • 4 tbsp. finely chopped fresh cilantro (chop extra if you will want to sprinkle some on top of the poutine)

Heat the oil in a pan then brown the chopped onion and the minced chili until they are soft and golden. Add flour and tikka masala spice mix to the pan, warming until fragrant. Next, add chicken stock and coconut milk to the pan. Bring to a simmer and cook for 5 to 10 minutes, stirring frequently. Don’t cook for too long or the gravy will be too thick. Finally, stir in cilantro leaves and finish making the sauce by adding the lemon juice.

DSC_4363
The recipe card for the Spice Post tikka masala spice mix; we made the chips and curry sauce for our poutines

The tikka masala gravy was fairly easy to make and we made it in advance. It is very rich, flavourful, and sure to be a crowd pleaser!

To assemble the poutines simply place a layer of potato nests on small plates, sprinkle with cheese curds, spoon on a generous amount of tikka masala gravy on top, and then finish by sprinkling some finely chopped cilantro leaves on top.

I hope I have inspired you to try making fries and poutine at home; it was much easier and tastier than I ever imagined it would be! Enjoy, and as always let me know if you make this recipe or have any questions!

DSC_4266
Crispy potato nests poutine with tikka masala gravy – drool worthy!
IMG_6126
The tikka masala gravy is also perfect for dipping!

Decorating for Easter

Growing up I always loved how my mom would decorate for each holiday – in particular she would add decorations to a massive flowerpot on the front porch and put up a new wreath on the front door. So once I got my own house I knew I would want to start that tradition too! I now have a little collection of decor pieces I put up for some holidays (Christmas, Easter, Valentines Day, and Halloween). I slowly add things to my collection as I find them; a great time to get decor is directly after the holiday when things go on clearance.

Easter has to be one of my favourite holidays – candy and chocolate are one of my biggest food weaknesses and Easter also comes with the freshness and new possibilities of spring! This year I have two main Easter decor pieces; a centrepiece with adorable painted Easter eggs and ceramic bunnies and my front porch cast iron urns filled with moss and Easter egg covered branches. These two decor pieces combined with putting away some of my more cozy, winterlike pieces and adding some more springlike items make a big difference in the feeling of the house!

The centrepiece sits on my dining room table on top of my bohemian inspired table runner that my mom made out of leftover fabric from reupholstering my thrift store dining room chairs. My favourite thing about the runner (besides the gorgeous, youthful pattern) is that it is made out of outdoor fabric so I never worry about getting it dirty since it wipes clean so easily.

DSC_4337
My Easter centrepiece on my dining room table

The bowl I use for my Easter centrepiece is actually a serving bowl that I use when entertaining a big crowd. But it’s beautiful curves, asymmetric shape, and large size make it perfect to use for centrepieces! I got the bowl at Loblaws in the Presidents Choice kitchen department two years ago; and I noticed last time I was there that they still sell them.

DSC_4330
My dining room table and plate wall; the plate wall is one of my all time favourite decorating projects I have done so far!

The spheres made out of vines in the centrepiece came from Homesense; they were packaged with little orange pumpkins that I put out in the fall. I use the vine spheres quite a bit now – so far I have put the little pumpkins with them, vintage Christmas tree balls from my grandma (they always make me remember Christmas dinners at her apartment), red hearts (for Valentines), and now the Easter eggs. The spheres have looked great with everything I have put with them so far so I highly recommend having a neutral piece like them around for decor! I regularly see items like this at Homesense; I think mine came to $12 for the box.

DSC_4339
Spheres made of vines – so much beautiful natural texture!

The painted Easter eggs for the centrepiece all came from Dollarama last year; I bought 3 packs of eggs at $2 a pack – what a deal! They came with ribbons on them, so I have the option of hanging them if I want. They have similar Easter eggs at Dollarama this year.

DSC_4338

Finally, my two ceramic bunnies came from Homesense last year; I got them on clearance after Easter for $3 each!

DSC_4336

DSC_4329

The cast iron urns sit on my front porch, usually flanking my front door. I dress them up for each season and I love their classic look. The only drawback of them is that they are really heavy; when it is cold and I want to change them around it is a lot of heavy lifting to bring them inside the house!

DSC_4305
One of the cast iron urns on my front porch filled with moss and Easter egg covered branches

DSC_4311

The branches in the urns came from Ikea – they are wires covered in a pearlescent plastic coating that is extremely weather resistant and durable. They were not cheap; each branch was around $20 with tax and I used 4 of them (2 per urn). However; I use the branches from late fall until early spring with my urns so this saves me a lot over the long term instead of using live foliage with every season. I just shove them into the potting soil in the urns and despite some very strong winds they have never budged. For the winter I sometimes left the branches bare, and around Christmas I tied ornaments onto the branches (plastic ones that looked real so that I didn’t have to worry about them breaking). Next year I may put twinkle lights on the branches!

The little pastel Easter eggs came from a dollar store (not Dollarama, they only had the bigger plastic eggs when I was there). I bought two packs of 12 eggs each for only $3 total. These are the kinds of seasonal decorations I love because they have the three C’s: Cute, cheap, and cheerful!

After sticking the branches into the urns and tightly tying the Easter eggs to the branches I thought the urns looked a little bare. So I decided to add a lush, green bed of moss on top of the potting soil in the urns. I bought the moss at Walmart for $3 for a big bag. So far the only drawback of the moss was that small pieces have a tendency to be blown out of the urns during stormy weather. I have found the moss even in my backyard, but I don’t mind since it is natural and pretty (but I will see if my neighbours say anything; if they do I will do something different next year for sure).

DSC_4287
Making my urns lush with bright green moss!
DSC_4314
The view of my front door when walking up the porch steps; cute and cheerful!

DSC_4304

My front porch is one of my favourite parts of my house; it has lovely bricks in a variety of colours and shapes, shiny black curled metal railings (when we bought the house they were a horrible rusty pink; repainting them was a long chore but so worth it) as well as a cute front door. When we first saw the house the front porch was the feature that made Eric fall head over heels for the house.

The forsythia wreath on the front door I bought at Homesense a few years ago and they have similar ones every year in the spring. I use it from early spring until fall so it really gets a lot of use! It also really pops against the front door. Speaking of the front door, it is currently painted with a matte grey paint that scratches easily and needs a touch up badly. This spring/summer I will be repainting it to make a bold statement so stay tuned for a post on that.

DSC_4317
My front door and cheerful forsythia wreath – it says come on in!

That’s it from me for now; enjoy your St. Patrick’s Day tomorrow and I hope you enjoyed this decorating post as much as I enjoyed writing it!


Baking: Raspberry Lemon Cookies

Since I am doing a lot of entertaining this week I thought it would be fun to make a springlike cookie – so I made 4 dozen raspberry lemon cookies! Lemon cookies always make me think of sunshine and spring, and raspberry plus lemon has got to be one of the best combos out there. These cookies turned out great, and are very tasty and pretty!

Modified.png
Raspberry Lemon Cookies along with one of my adorable ceramic bunnies

For my recipe I looked through all my recipe books at home and couldn’t find the right springlike cookie. I then went browsing for lemon cookie recipes on Pinterest and found the perfect recipe: Raspberry Lemon Cookies by the baking blog Bake.Eat.Repeat (recipe at http://bakeeatrepeat.ca/raspberry-lemon-cookies-recipe/). The ingredients are pretty simple for these cookies; standard cookie dough ingredients plus frozen raspberries and the zest and juice of a lemon. The original recipe was for 24 cookies so I doubled it to make 48 cookies (but ended up with 52 cookies, yay for more cookies!).

DSC_4234
All the ingredients ready to go!

When baking these cookies the most important thing to keep in mind is that the frozen raspberries will thaw really quickly once they are out of the freezer. After taking my ingredients picture I tossed the raspberries right back in the freezer while I put together the rest of the cookie dough ingredients. The raspberries will be the very last ingredient you add to the dough; and once you add the raspberries they begin to melt right away, making this already sticky dough even stickier! This makes it vital that you form your cookies as fast as you can and get them in the oven. While a batch is in the oven refrigerate the remaining dough to ensure your raspberries don’t melt.

DSC_4242
The cookie dough right before adding the raspberries
DSC_4243
Quickly coarsely chopping the frozen raspberries

One thing I would have done differently with this recipe was to not use the frozen raspberries I had opened for breakfast smoothies a while back; they had excess ice which really made my dough sticky! I tried to remove the extra ice as much as I could but some of it definitely made it’s way into my dough.

DSC_4245
Dough ready to be formed into cookies

I was especially excited to bake cookies because I bought a cookie scoop recently and hadn’t tried it yet. After baking my biggest batch of assorted Christmas baking ever in December (over 16 dozen pieces!) I realized I really needed a faster way to scoop dough. I bought the medium sized OXO cookie scoop online from Bed Bath and Beyond (http://www.bedbathandbeyond.ca/store/product/oxo-good-grips-reg-cookie-scoop/102818). It works great and saved me lots of time, plus it makes very uniformly sized cookies which is a big plus for sure!

DSC_4253
Scooping the cookies with my new cookie scoop; I was so excited to finally use it!
DSC_4257
All 52 cookies on the cooling racks
DSC_4272
These cookies are soft, chewy, and have the perfect amounts of raspberry and lemon flavour

DSC_4271

I hope I’ve enticed you to make these great cookies; if you do end up making them please let me know how they turn out!

Do you have a favourite spring baking recipe? Let me know in the comments!

Thrift Store Treasure Hunts

For my first content post I figured I would talk about something that I love: Thrift store shopping! It is something I always loved growing up – and I still continue to do because it is really fun and you can find some amazing stuff that no one else will have. My house (and my wardrobe and kitchen drawers) boast many thrift store finds. In general, thrifted items get a lot more attention than my other stuff because they are interesting and unique. Decor wise, they add charm and patina to my home that give it that comfortable lived in feeling. In my vintage looking 1960’s house they also fit in a lot better than all new stuff. Also let’s be real – thrifted items are really cost effective!

Growing up my mom and I would frequently go to thrift stores – she had a knack for finding what our family needed, and at modifying items to make them functional and pretty. I have three brothers so getting things at thrift stores (or garage sales) made a big difference to the budget. Many Halloween costumes and theatre costumes came from the thrift store. In fact, I never told anyone this (and now the whole internet will know yay!) but even my prom dress came from the thrift store! It was beautiful and my mom altered it so it was perfect. In university I also did a lot of thrift store shopping; especially when the budget got tight near the end of school. I got Eric into thrifting when we found a very expensive copper bottom saute pan for only $20. We still have that pan and it is a joy to cook with! We also bought many beer glasses and other glassware from the thrift store.

75833_458562297104_6102491_n
Thrifted Katy Perry and Snopp Dogg “California Gurls” costumes in 2010!

When I got my full time job after school and moved to Toronto I remember thinking how excited I was that I would not need to go to thrift stores anymore. Eventually though, Eric and I bought the house; on moving day all of our possessions fit in a third of the smallest moving truck U-Haul had. When we unloaded the truck we had an extremely empty house with many rooms, and not much of a budget to buy furniture. I realized that if I wanted any chairs in the house for the first few months that maybe I should venture out to some thrift stores. That is when I found my four solid wood dining chairs for $100 – I was hooked once again!

11625_10155302045555447_6939602072535480935_n
One of the four dining room chairs I bought at the Salvation Army, cleaned up and reupholstered. Each chair was only $25, and they are very comfortable and cute!

When people ask me about thrift store shopping I always mention a few rules and tips that I have picked up. So here they are – maybe you can give thrifting a shot (or up your thrifting game):

  1. Do not buy anything that you can’t fully clean. This includes things like couches and mattresses. You don’t know where it came from or what could be living inside it (like bedbugs ugh). Also, expect to spend some time cleaning up your purchases.
  2. Inspect anything you intend to buy very closely; a lot of times items that are donated are damaged.
  3. Visit stores often; on some visits you may not find anything but don’t let it discourage you!
  4. Have a shopping list of items you are looking for and their dimensions (if applicable). Carry around a small measuring tape so you will know right away if something will work for you.
  5. My favourite thrift stores: Value Village and the Salvation Army. Both have high turnaround, decent prices, and many locations. They also have sales! I have also had luck at small independent thrift stores but I haven’t found a good one near my house yet.

Below are some of my favourite thrifted items from the last year or so. All of these items were purchased from the Salvation Army or Value Village near my house; these stores have proven to be a gold mine!

12799320_10156524222165447_392987392162053469_n
Just bought these last week: Milk/sugar jars (great for entertaining), copper kettle (which I turned into a planter, more pics later), and a steel blue enamelled oil lantern. The grand total was only $16!
12309591_10156199705755447_1701794224700629026_o
The two glass decanters were thrifted for around $5 each! I bought the jingle bell stopper since the stopper that came with that decanter was in rough shape. I have since added another thrift store decanter to my tabletop bar.
12309963_10156199705785447_5332633629544040104_o
I bought the milk glass vases for a few bucks each. I have quite a few of these around the house; they look great with all the white baseboards and moldings.
11930784_10153006863546135_5466657119577504368_o
You can’t see much of it, but I got a very fun jewelled BCBG dress for $25 at Value Village and then wore it to a wedding over the summer. The dress still had price tags on it – it was priced at $200 when it was bought! I think the only reason it was still there was that it was a bit wild of a dress – just my style!

Happy thrifting! And happy weekend 🙂

Welcome!

Welcome to the first post of Fortnight Living! Fortnight Living is a blog where I will be sharing things about my life and getting back into writing. In particular, I will be writing about several of my passions: Home decorating, cooking, fashion, shopping, and life! There will probably be posts on career stuff, marriage, dogs (especially my Pembroke Welsh Corgi Newton), and other random topics too. I am so happy to have you here so I can get all chatty about things that make my heart sing, and hopefully yours too!

A little about me – I’m Rebecca Cousineau; a woman who lives a double life (oooh mysterious). Since May 2012, I have worked as a geological engineer at a remote gold mine for two weeks at a time. After my two weeks of work are done I then I return home to Toronto for two weeks of time off (hence why this blog is called Fortnight Living). I married my university sweetheart Eric in January 2015 and we (and Newton) live in a house we purchased in Toronto in October 2013. As you can imagine, two weeks off every month leaves me with a lot of free time on my hands – so I generally use it to work on decorating the house, cooking and baking, shopping, and long walks with Newton. Back in school I used to write for the engineering newspaper (Eric and I even wrote a beer column together), so it is high time that I get back to writing again!

11037357_10155289518515447_934731126510176593_o

Now that wedding planning is over (I had so much fun with that!), the house has been bought and fixed to the point where it is functional, and Newton is no longer a puppy – I all of a sudden have a lot of free time on my hands. Which you would think would be a good thing, but it turns out that I am going nuts not having something big on the go. So instead of driving myself and Eric crazy I decided it was time to start a blog! Eric has two beer blogs that made me realize I really missed writing.

1513978_10153918935670447_459198892_n
Eric, Newton and I during our engagement session back in 2014

The House: I am sure I will write more about this later, but Eric and I had a long adventure buying our house in October 2013 (after a long house hunt we ended up in a bidding war and had to beat out 9 other offers to nab our fixer upper). Toronto’s real estate market was hot, and it has only gotten crazier since then! We are slowly starting to win the battle in turning our home into the updated vintage charmer it has always wanted to be. The house was built in 1962 but has a more 1950’s vibe partly due to the fact that a lot of it is in it’s original state – it only had two owners before us. That was a big part of the appeal of this house; it has very good bones. The house has a lot of windows and space for us to eventually grow into. Cool features of our home include: Crystal doorknobs, a fully functioning brewery in the basement, a very old kitchen with white laminate counters with gold stars (not even joking, I will post a picture once I do a post about our future kitchen remodel), and a door painted to look like the Jamaican flag (we DID NOT do that, I swear I will paint it soon). There is still a lot of work to be done and I have made it my mission to make this house a cozy, bright and welcoming home!

DSC_4232
The house as of March 2016

I look forward to writing this blog and seeing where it goes! And don’t be strangers, there is a comment section for a reason 🙂

Cheers,

Rebecca