
Hi everyone! Sorry it has been a while, I have been very busy with work, travelling, and life! I’m working on lots of projects; but don’t worry, I have been taking lots of pictures as I go and will be writing posts as I find time!
Before I get into how I have upgraded the dresser in my master bedroom I wanted to let you know about a very exciting project I got started on my few last time offs – my long awaited, highly anticipated, kitchen renovation! Eric and I had a structural engineer perform a site visit to evaluate our options for wall removal on our main floor to expand the kitchen footprint. Out of the 3 walls we want to remove only one is load bearing; and it will be able to be removed without having to put up bulkheads or pillars. One of the other 2 walls we are actually removing on our own during this time off – the wall between the dining room and the office room that will become part of the kitchen. Eric and I are so excited to remove that wall (although he was a bit apprehensive about letting me near a sledgehammer)! Now that we have our structural answers we can start to plan the kitchen renovation and I can’t wait to update you as we go!

Now on to the dresser upgrade! As I have mentioned before my master bedroom has one rather small closet so I have been very conscious of adding storage space; once our family expands all of Eric’s and my clothes will need to be in the master bedroom. So far for storage we have two nightstands with two drawers each, four large drawers in our bed frame, a storage bench at the foot of the bed (which also acts as a step so Newton can easily jump onto our bed), and a small four drawer wooden dresser. This dresser was Eric’s when he was a student and is a good solid piece of furniture; but for two of us it is just not enough storage – right now it only has his clothes in it! I also want more surface space so I can add some more style to our master bedroom.

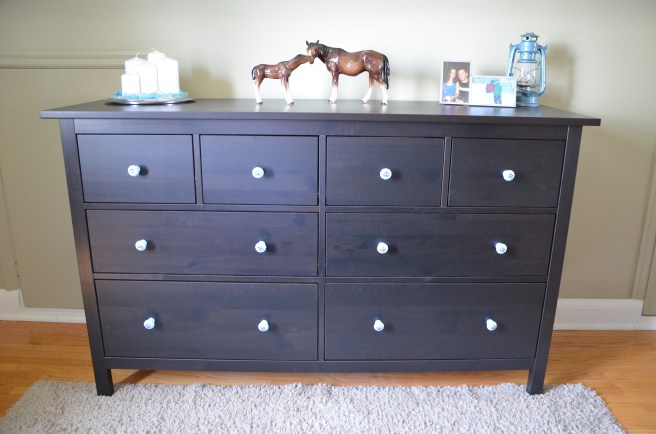
Eric agreed it was time for an upgrade (after I bugged him for a while!) so I happily dived into researching dressers. There I had the unpleasant discovery that dressers are surprisingly expensive, especially the ones I had in mind. So I turned to Ikea to find a dresser that was affordable and large enough for Eric and I. Since I wanted 8 drawers I settled on the Hemnes from Ikea in the dark brown finish to match the other furniture in the room (HEMNES 8-drawer dresser, black-brown $299.00). I did hope to mix and match the finishes in this room but sadly our hardwood floors make that very difficult since they have an almost orange undertone to them. This dresser comes in 3 large flat packed boxes and is definitely a time sucker to assemble. Eric and I have put together tons of Ikea furniture and anything with drawers is usually very tough. Sure enough, with 8 drawers, a long length, and hundreds of parts this behemoth took us two full nights to assemble together. When it was done it looked great but a little plain, especially the knobs.
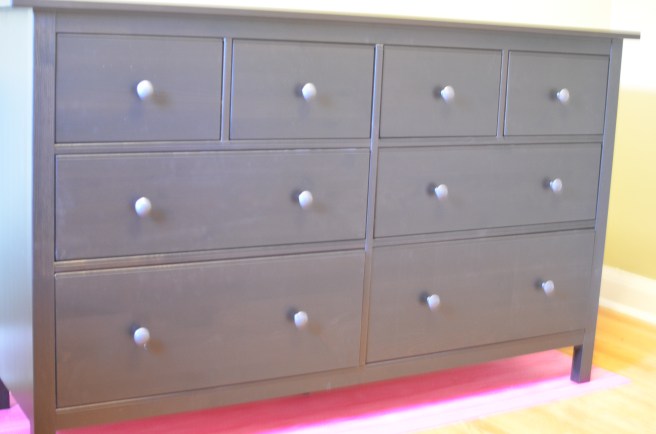
So I decided to use my usual trick of buying some beautiful knobs at Anthropologie, one of my favourite stores. This was the approach I took with my master bedroom nightstands and my sofa table drawers, and it is a touch that people always comment on. Plus I am a very tactile decorator and I get a lot of pleasure from using beautifully crafted hardware! Is that weird? Probably! Anyways, with Eric in tow and my colour palette in mind (light and dark teal and blues, to match my duvet cover) I eagerly began scouring the gorgeous knobs and hardware section of Anthropologie…and came up empty 😦 Nothing they had fit my colour scheme, and even the neutrals weren’t cutting it for me. This was a first for me – I left Anthro empty handed. But I never give up so as soon as I got home I began scouring the internet for my knobs – and found them (surprisingly) on Amazon.ca (Sky Blue Fluted Ceramic Knobs)! It was around $70 (with shipping) for 12 of the prettiest light blue ceramic knobs with silver hardware – far cheaper than 12 knobs from Anthropologie but with just as much style!
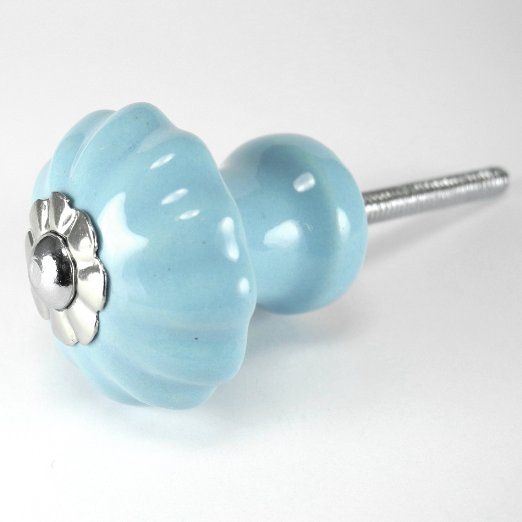
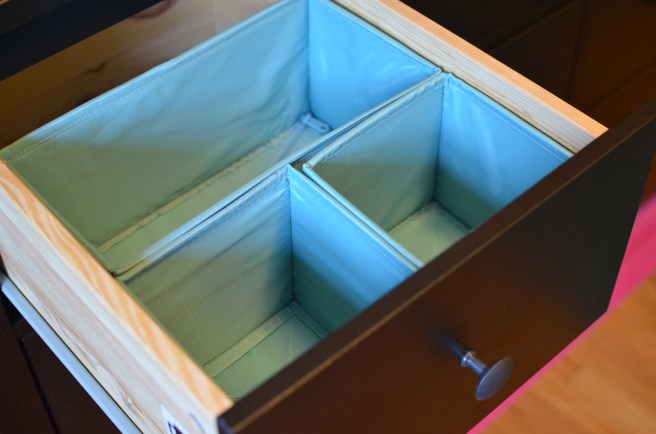
Once I installed the knobs (so easy and quick!) I loved the dresser much more! Eric and I then moved it into our master bedroom and filled the drawers. One of the best things about Ikea furniture is all the accessories they carry for each piece – in this case, they sell collapsible drawer boxes so you can fully organize and customise your dresser drawers. I bought two sets of Skubb boxes (6 boxes in each set for $9.99 per set) so that Eric and I could make our clothes fit in the drawers exactly how we want them.
The last step was for me to style the surface of the dresser, for which I used decor I already had. It is amazing how much this has improved the function and look of my master bedroom!
With this dresser I am almost done this room – the last step will be to paint the walls a very light grey to create the serene retreat I have been craving! I can’t wait to paint over that ugly green for good!
I hope you enjoyed reading about my dresser project and I hope to post again soon about some other projects I am working on! Until then, enjoy your summer!
