On Traveling and Reconnecting

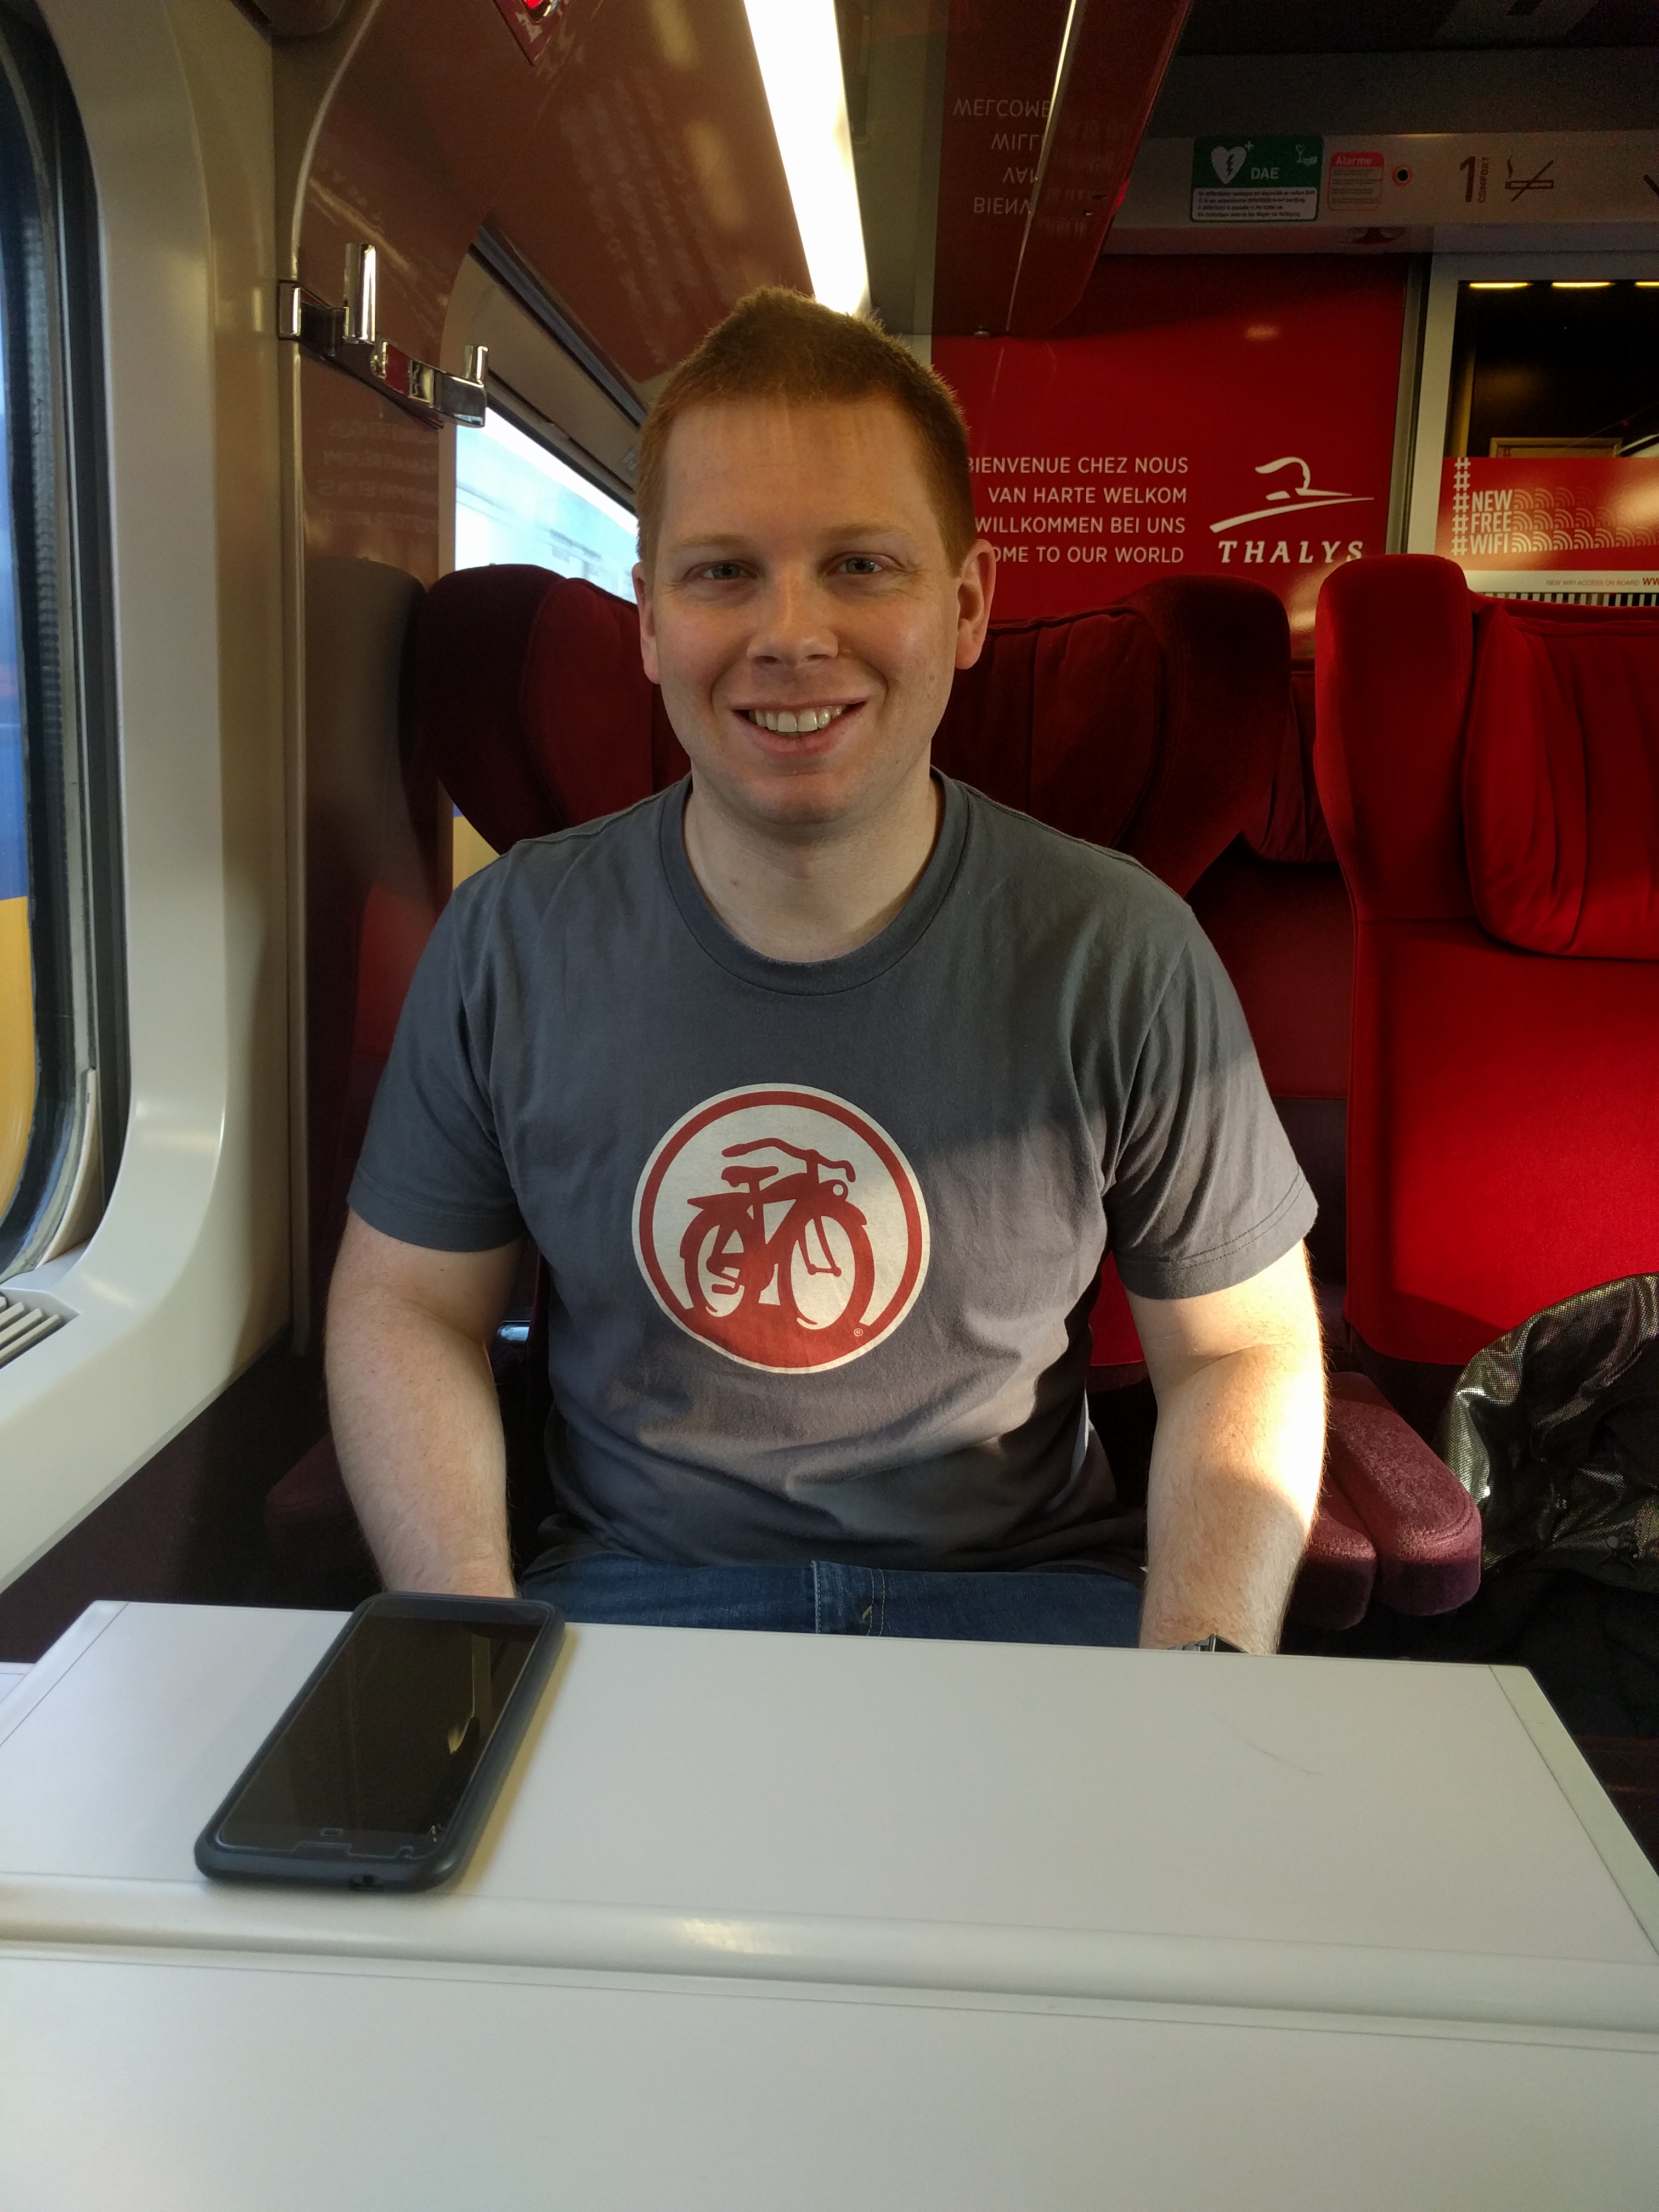
I’m writing to you from one of my usual haunts; a plane seat. The busier my life gets the more this has become the place where there are no other demands on my time and I can just write. Unlike most flights I take, today Eric is sitting beside me which gives me so much enjoyment; it’s nice to have company even when he is fast asleep. We are on our way home after an incredible 12 days touring all over Belgium (with a little Netherlands and France thrown in for good measure). It was our first time in Europe and it was glorious!

Many people are surprised to learn that Eric and I haven’t gone too far from North America; we did mean to go far from home for a while – but life gets in the way! For us it has been the never ending list of financial goals; but we finally got the big renos done on the house and we knew we had to go to Europe and finally see the places we have wanted to see for so long. This trip was a beer focused trip – Belgium is considered the best beer destination in the world so naturally it is where Eric and I decided to go for our first trip to Europe. Although honestly, our trips are usually beer focused no matter where we end up!

Eric and I live a pretty hectic life; since I am home less than half the time our limited time together is generally jam packed and not so relaxing. It’s something we constantly have to work on. It comes with our jobs and has been like this for more than five years. So, for our vacations we actually get much more chill time together than usual; we have long chats and drives, sit for hours drinking and eating, and go to bed at normal times for more than 6 hours (that last one is sad but true, we are sleep deprived night owls!). Each time we travel we learn more about each other and this trip was no exception.

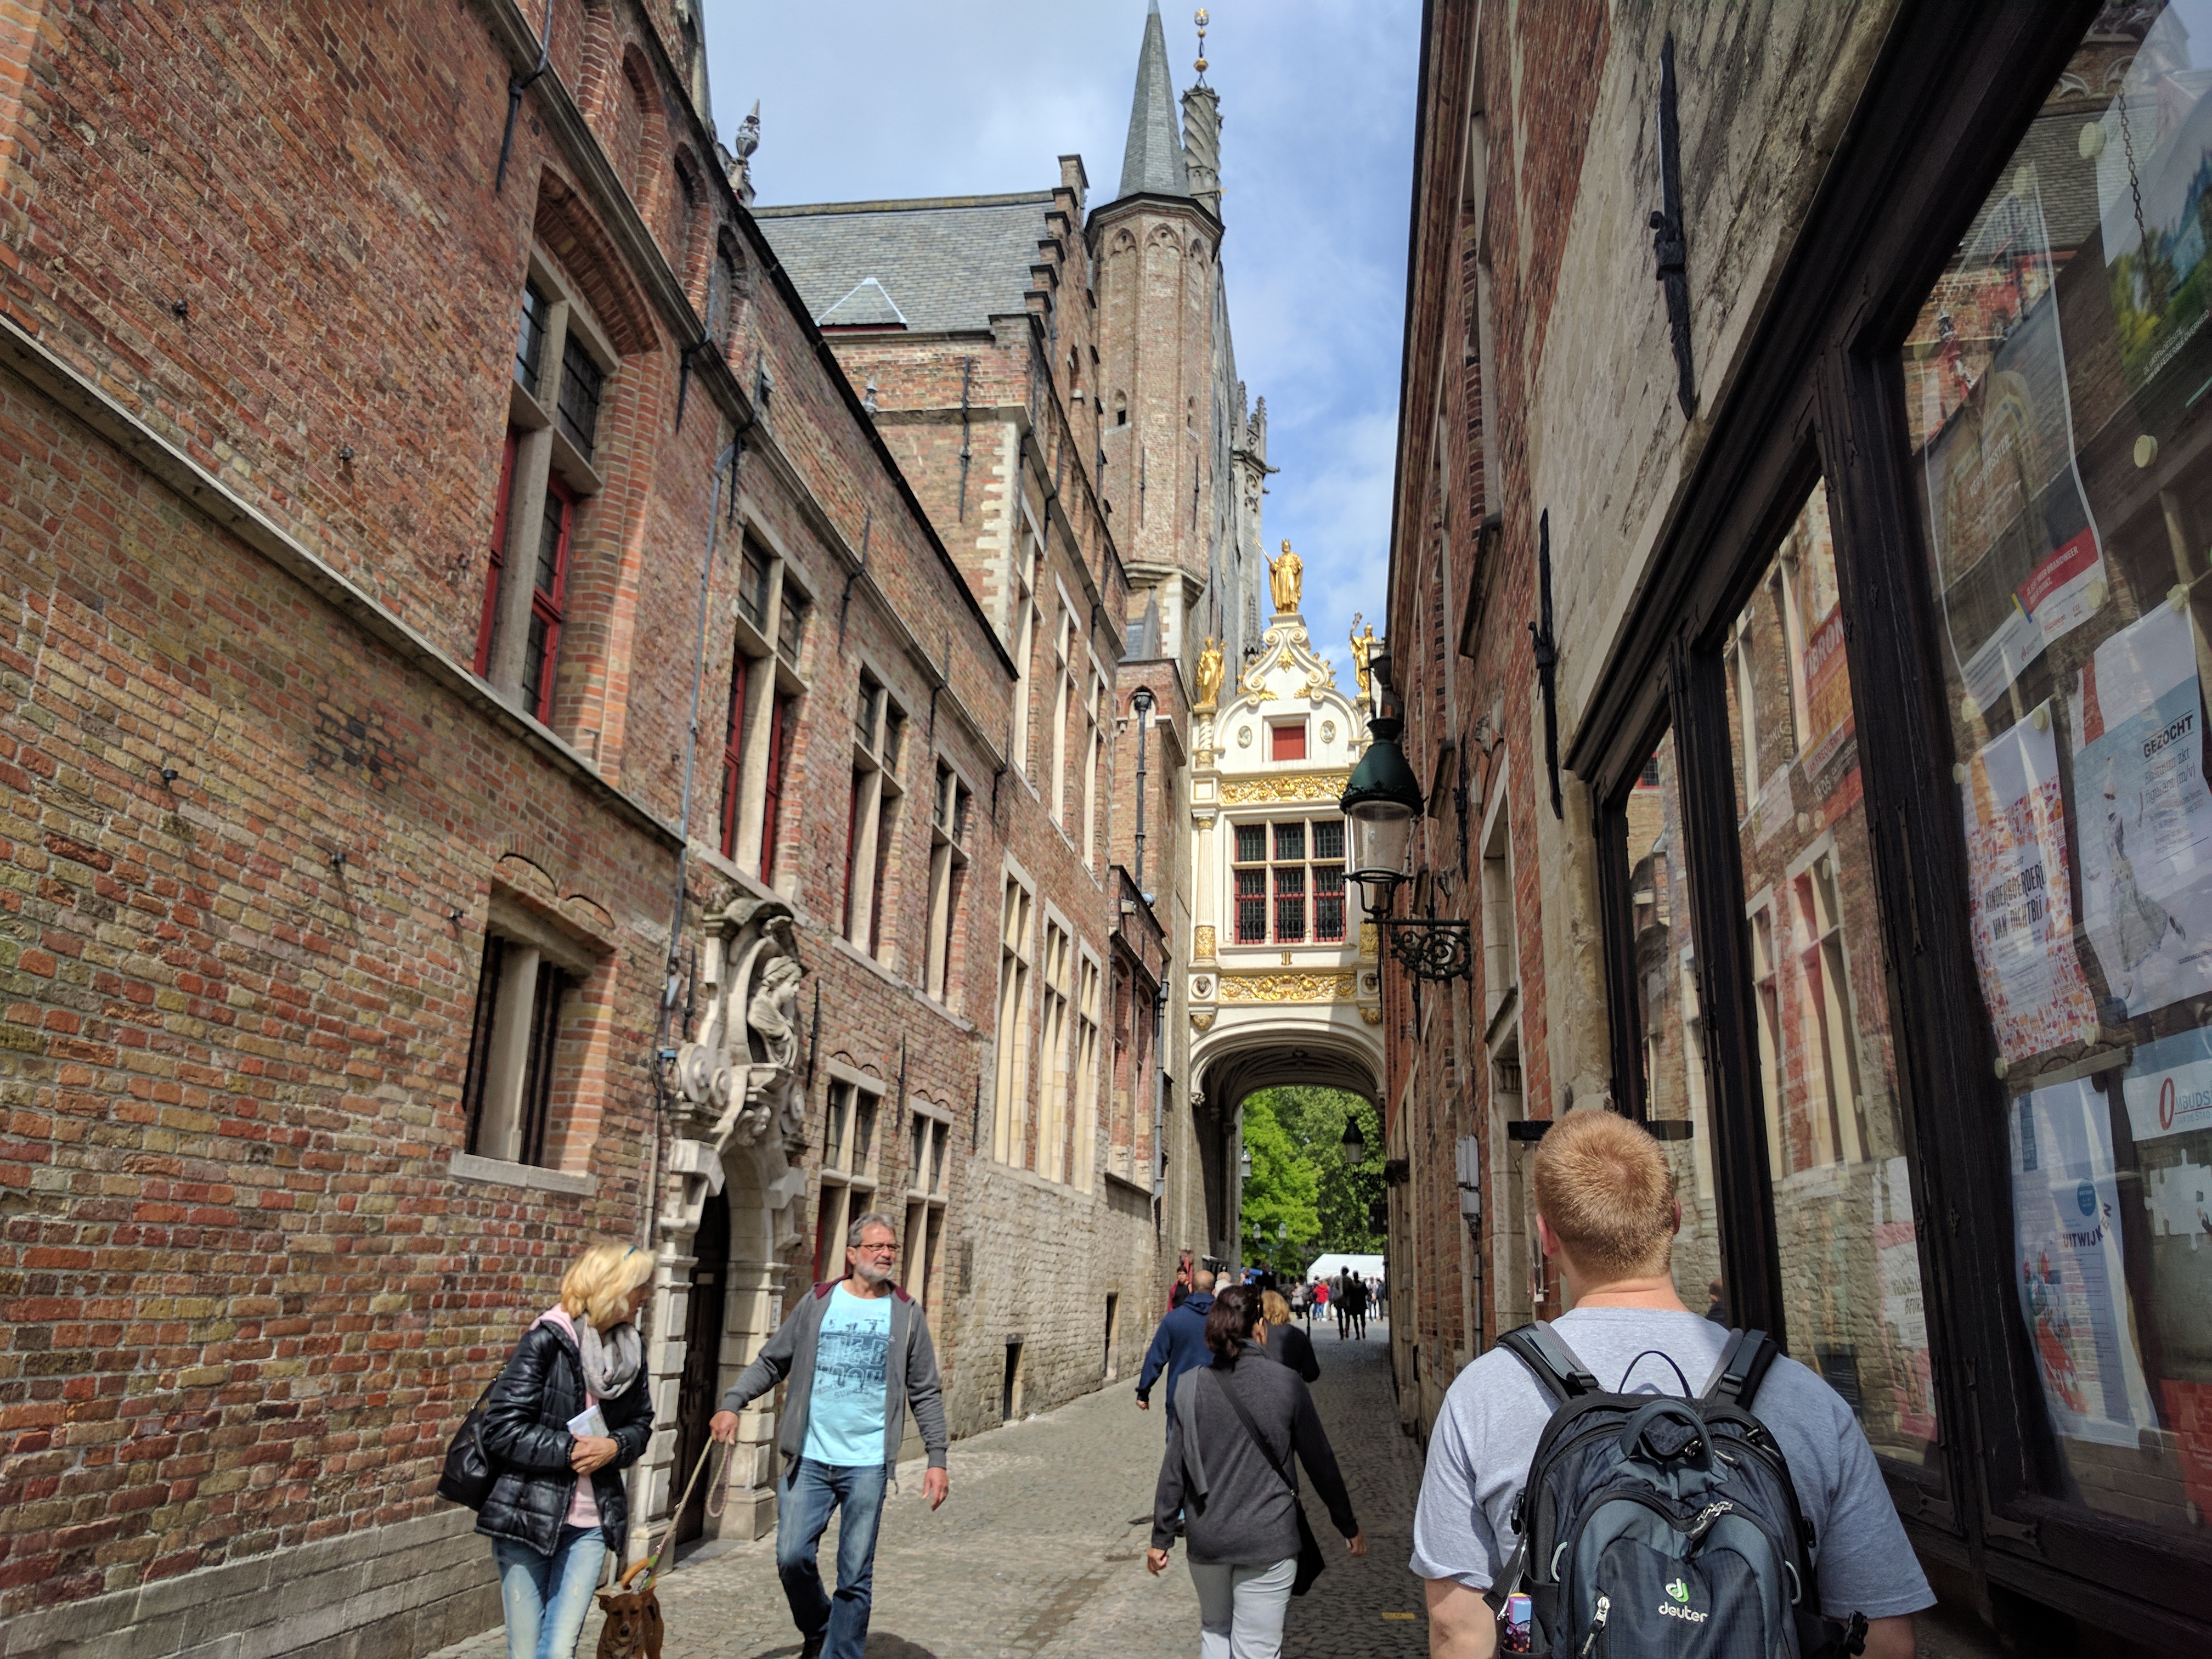
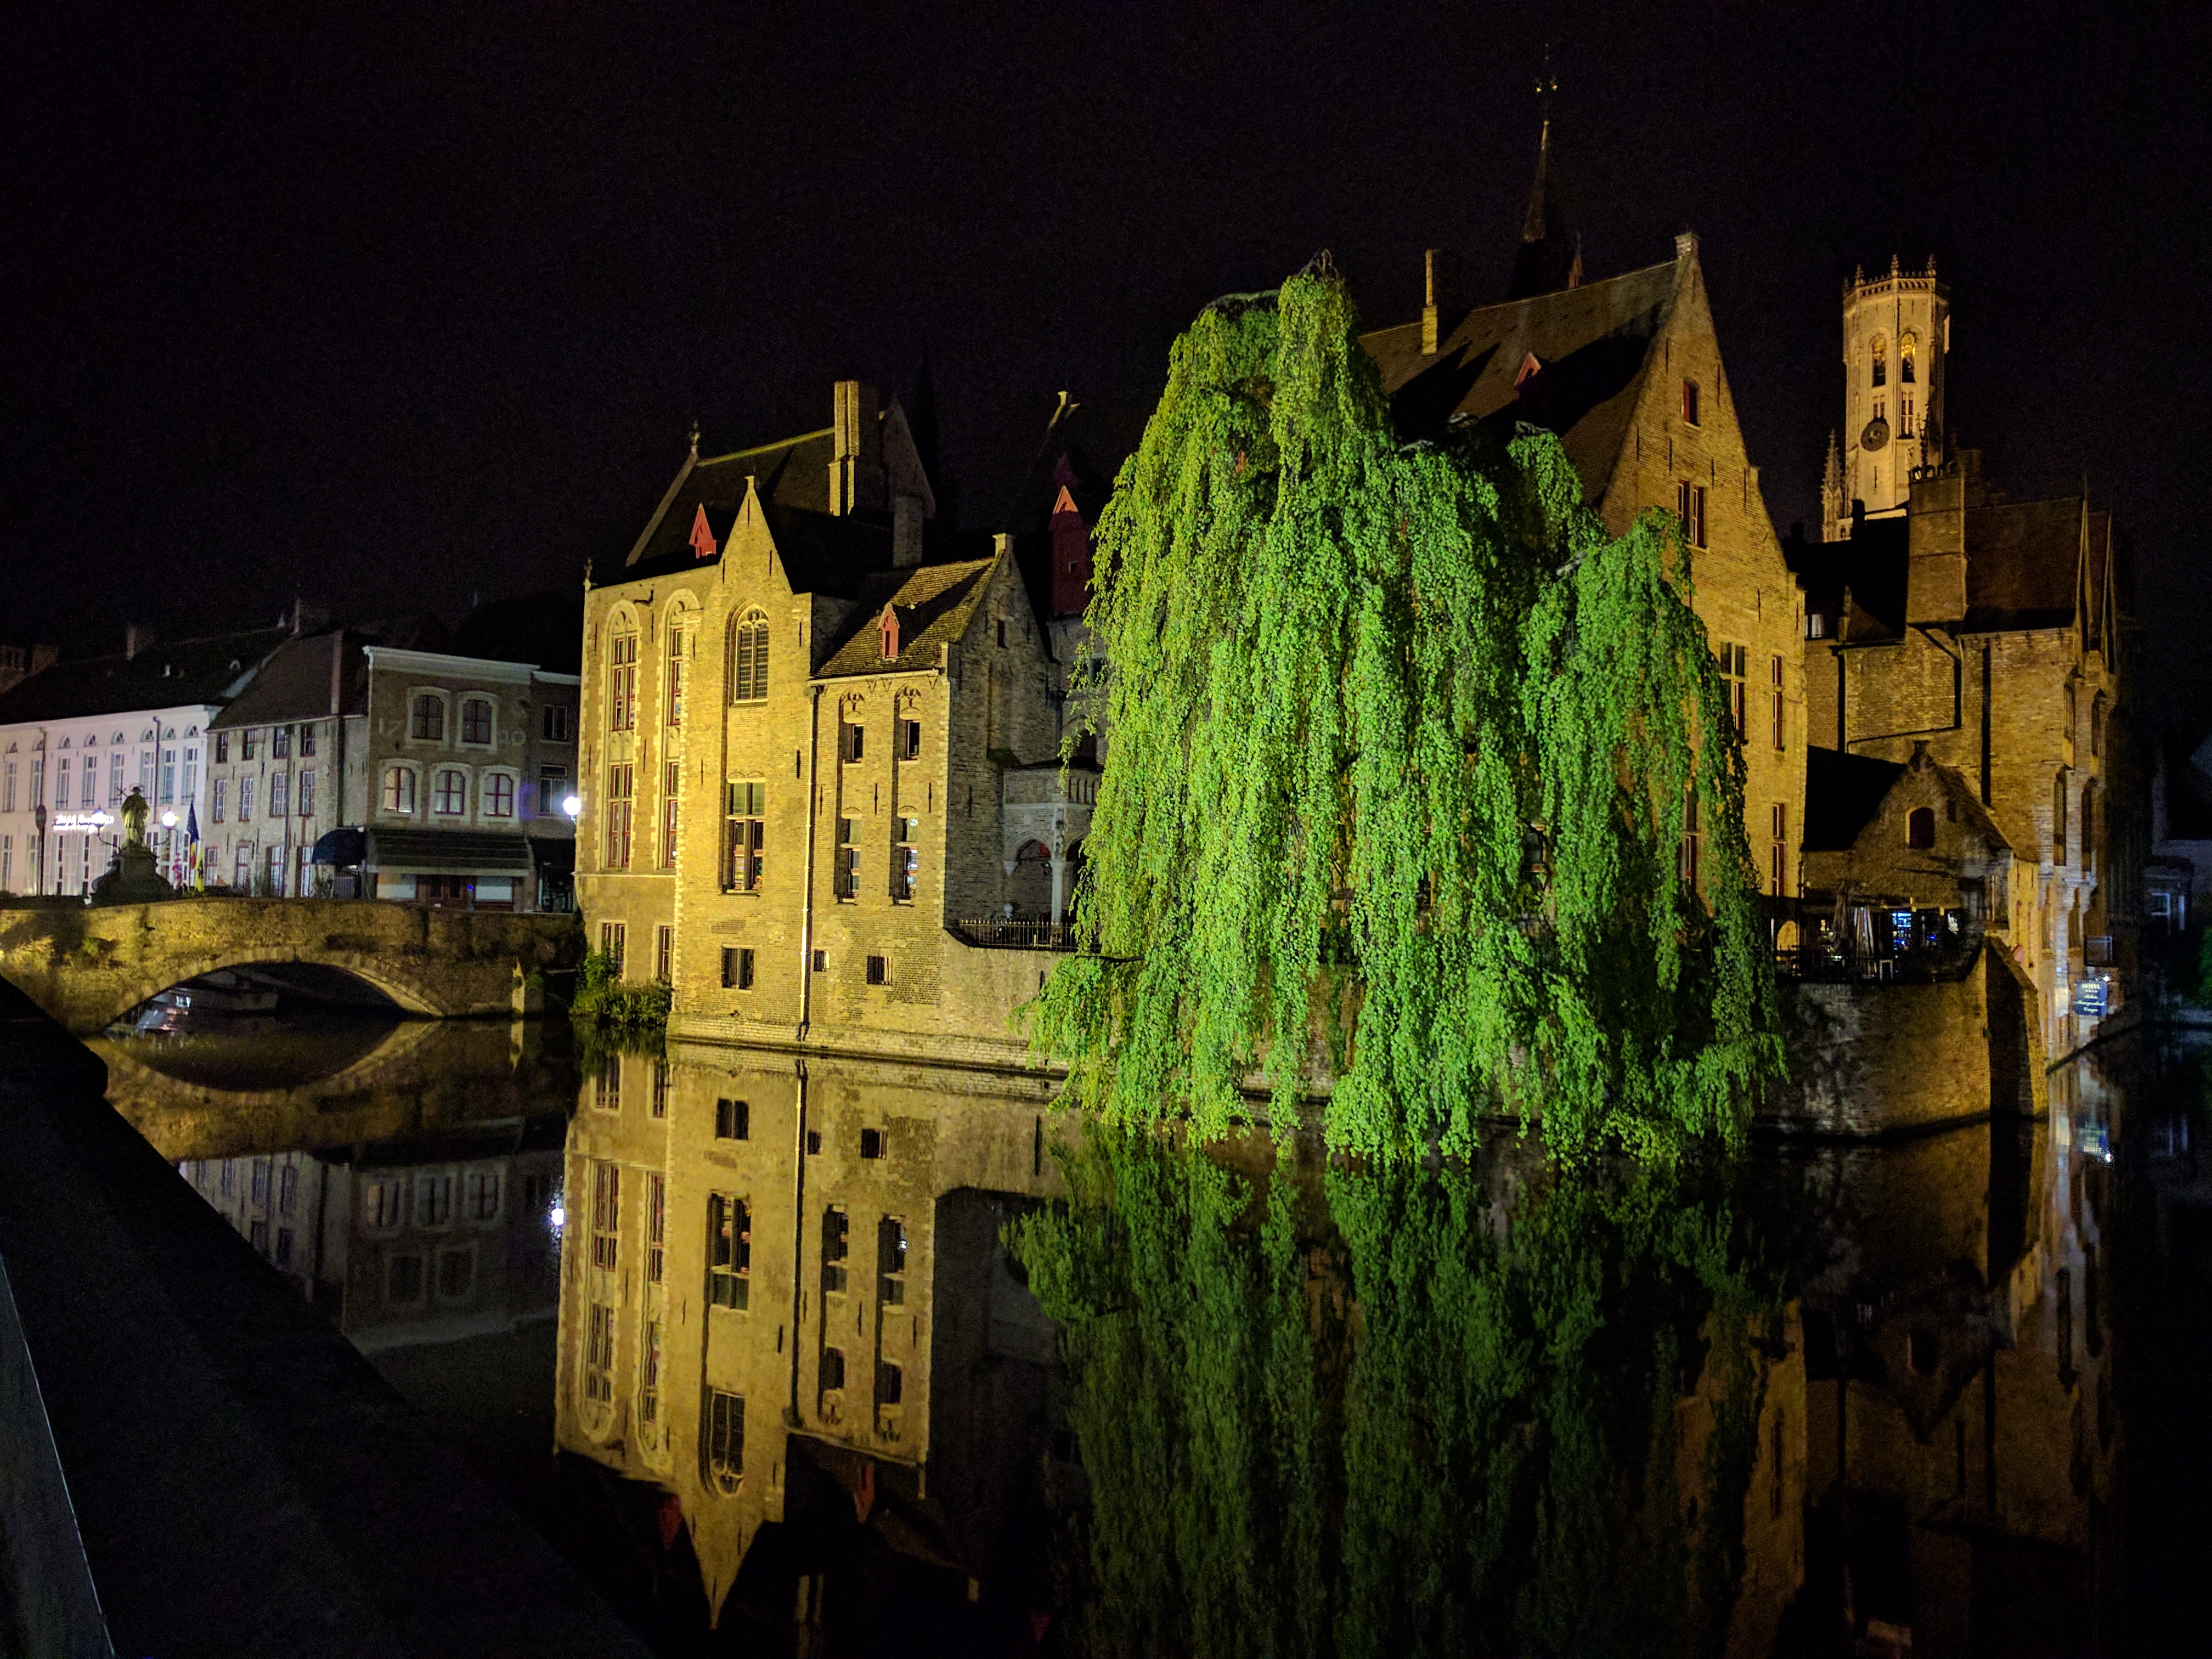
I learned Eric’s French is rusty but very much still there, and that despite being half Dutch that language is incomprehensible to me. I learned that driving into downtown Bruge requires the best teamwork possible; the narrow cobblestone streets that twist and turn are treacherous, especially when packed with distracted tourists and bikes. I learned he is willing to try any local food and so am I if he is (raw herring anyone?). I learned that even in the most practical footwear I will trip my way across countries (and I have the bruises to prove it!). I learned a weekend of touring 10 sour beer breweries will make me very sick and that Eric will be there to do what he can to make me feel better. But mostly what I learned is that together we have each other’s back, in every place and situation. And that no matter how far we are from home, that if we are together we ARE home!

Travelling can be tiring and exhausted people can get on each other’s nerves; which happened to us a few times (especially navigating in an unfamiliar country). But Eric and I have discovered that as we age together it gets harder and harder to be mad at one another. Irritated sure, but actual anger? Not often at all. If we are it is usually linked to needing food or sleep…

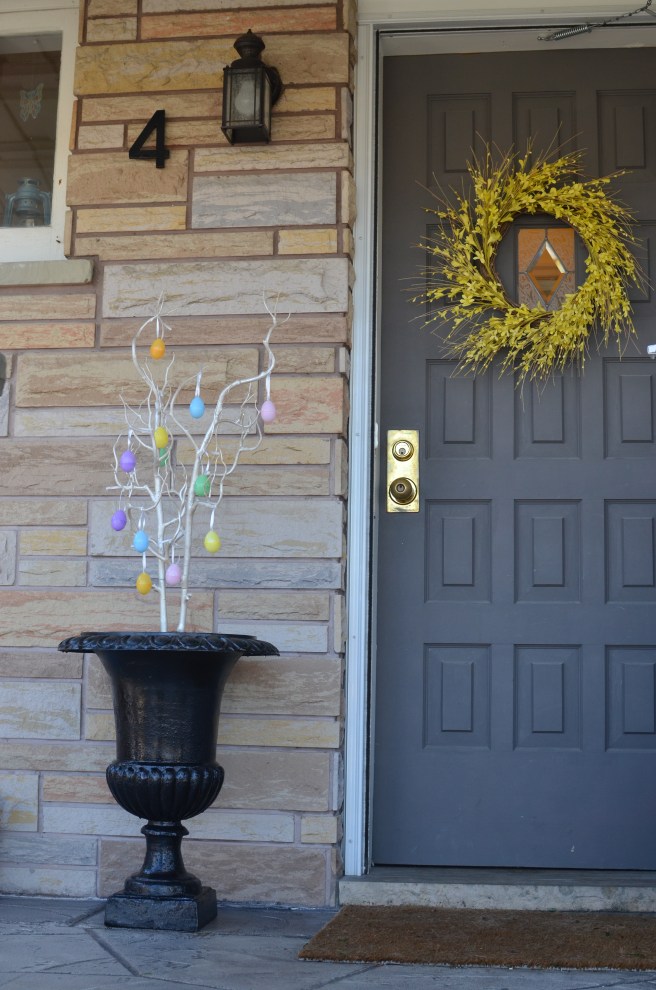
Eric and I also learned 12 days is more than long enough away for us – we are both homebodies and are longing to get home to Newton and the house (and to to binge watch tv episodes on our couch). I am eagerly awaiting the sight of our front door and opening all the curtains and blinds to flood the house with late afternoon sunshine. But I know that soon enough we will begin to dream and save up for our next trip! And until then we will talk and think about all the wonderful things we did and saw on our last trip!

I hope you are all enjoying the beautiful spring weather, I’m going to start by mowing our lawns as soon as we get home!

A Long Hiatus, A New Space, and A New Year!

Hello everyone! It’s been a while – I bet you all thought I forgot about my little corner of the internet! Last time I wrote here was July 27 2016 and it was about my desire to slow things down in my life…well now it is 2017 and I haven’t had a moment since July to relax one bit! Funny how life throws curveballs like that, just when you think you have it all figured out.

It turns out that days after I made that last blog post that I got some thrilling news. But to fully explain I have to rewind back all the way to fall 2015 – when I applied for a contest to win a free kitchen from a big Canadian home decor magazine…and then Eric and I got into the top 3 entries of 400 and promptly lost 😦 Womp womp womp, sad trombone. I was sad for about 1 day until I hatched my next kitchen renovation scheme (in true Rebecca fashion). With the almost success of that kitchen winning venture I was finally able to convince Eric that we might be a good candidate for something I had wanted to do for years – to apply to be on a home renovation tv show!

Naturally Eric still thought there was no way we would be chosen, but bemusedly gave me the thumbs up to start applying. I hounded the casting calls page of a Canadian home reno TV channel for months. Several shows posted casting calls but they just weren’t what I was looking for. Until one day a brand new show opened a casting call that just sounded perfect for us and I got that tingling feeling that meant we HAD to apply. Eric also agreed it sounded good for us so I applied to it – and I had a strong sense we would get casted.

I applied in early May 2016 and waited patiently for months, the tantalizing possibility of the show nagging at my brain. In early August I received the email that we had made it to the next stage of casting! Then after two months of interviews, video tours, house visits, questions, and nail-biting waits we were finally cast right before Thanksgiving in a show that would renovate our very outdated and rundown kitchen – with us performing some DIY to help keep costs down!

Ever since Thanksgiving both Eric and I have been in overdrive – before the reno/show filming began we had to pack up our kitchen and main floor, then lots of filming days and reno days, then the big reveal near the end of November! After that we then had to put our upside down house back together, prepare for Christmas, and host a 16 person dinner on Boxing Day!

Our 2016 Christmas Tree – we were so busy we ended up putting it up on December 23rd! Needless to say, it stayed up until mid-January!

Needless to say, we are both due for some R&R in 2017! We are so proud of what we accomplished in 2016 but so tired – I feel like hibernating until our episode airs in the spring (last air date we heard was sometime in April). I am so looking forward to relaxing and getting cozy in our new space! Of course, this will include cooking, baking and decorating so stay tuned! I will be able to reveal my new kitchen and main floor once the episode airs but it is truly beyond my wildest dreams for the house. I am very excited for life to slow down so I can blog again; writing has always been so relaxing for me!

But I digress; time to get to what I really wanted to talk about – what this experience and what 2016 in general taught me. I learned that opportunities are everywhere and you not only have to reach for them – you have to also work your butt off, without even knowing if the opportunity will be yours. The hardest times are when you give an opportunity everything you have and it just slips away. But one door closes and another will open and it will be time to decide if you want to leap and try to grab a new opportunity and hold it close and make it yours.

So 2016, you’ve been a real ride – but now it is time for a long nap to start 2017 off! Enjoy these cozy winter months everyone, spring will be here before we know it 🙂 I will be back soon with more blog posts – stay tuned!

Fast Fortnights and Moments of Joy

Hello everyone! As I write this I am on the charter plane from work between Chuchill, MB and Val d’Or, QC. I just watched a movie (Brooklyn for those who are interested) and found myself lost during the final credits, deep in thought. Does this happen to anyone else? It feels like you are coming out of a dream as the credits roll and the theme music of the film begins….

Anyways, today’s post is a bit different than my usual ones about decorating, fashion, and cooking – it’s about life lived in fast fortnights, and a strange schedule that results in lots of time to think and then suddenly, none at all. It’s also much more substantial and deep than my usual topics. But I started this blog to write whatever I wanted, so here goes!

As you probably know I work two weeks at a time at a gold mine in Nunavut, then have (almost) two weeks off at home in Toronto with very few work obligations. I started this career almost four and a half years ago when I was fresh out of school. The job opportunity was and continues to be absolutely incredible and it brings me a huge sense of accomplishment and pride! Along with my husband and family, it has made me who I am today and has given me a sense of confidence and self-worth that I never expected to come from a career. Originally when I started my job I fully intended to do it for only two years max – to gain experience, pay off my student loans and debt, and then to go work in consulting somewhere in the Toronto area.

Selfie time at work!

My first rotations back in 2012 seemed to go slowly as I got accustomed to working long, 12 hour days full of challenges and learning. My time off was full with building a real, non-student life with my eventual husband. I paid off my student loans and debts. We got engaged soon after on a cold, clear winter night in Quebec City. We saved money as much as we could so we could achieve our dreams: get a puppy, buy a house, have a joyous wedding, buy a new car! We also worked hard at our jobs, we saw our early 20s as the perfect time to throw ourselves into our careers. We got our corgi, Newton! We bought our house! We got married! I got a big promotion at work, so did Eric! We bought a new car! Quite suddenly time was moving in great leaps and bounds, from one milestone to the next. My two year deadline was past.

Time has continued to run so fast I can barely process it and suddenly I have had the (probably somewhat late) discovery that Eric and I are now 100% real-life adults with demanding jobs and a host of responsibilities. Gone are the days of frequent gatherings with school friends, as we all grow up and move away or just simply get busy. Now I am four and a half years out from school and my school days are blurry, tinged with a glow and a fondness that never seemed that way while I was living it. With the pace of life these days, these quiet moments on a plane or during the serene early mornings spent in bed with Eric or anytime where I can let go of everything are something I treasure.

Looking both at what is in front of me and behind me I am realizing this is what life is – mostly mundane and full of hard work but interspersed with moments.The moments we treasure the most are those of deep joy; joy from the thrilling moments or joy from the moments of stillness and peace. The moments we dread are there too; moments of sadness, fear, and frustration. But we always strive for the moments of joy. All the hard work, the toil, the struggle, just for those brief, golden, moments of pure joy!

A moment of joy – finishing a fantastic wakeboarding run!

At this point you are probably wondering where I am going with all this! Don’t worry, before you ask me I will assure you I am not switching jobs or pregnant or any of that!!! I am very content with life but have had the realization that it is time (probably past time) for me to enjoy this stage of life and to relax more during my time off – and to seek those moments of joy; particularly the ones caused by stillness and peace. I want to slow my pace a bit on the projects at home to spend more time relaxing, and to recharge more while I am at home so I can continue to hustle at work. Most of all, I want to spend more time soaking in the joy that comes with spending quality time with my husband, especially the joy of just simply being together, not rushing to get things done. The time spent rushing from one thrilling moment to the next has been great, but now I am craving some serenity and I want to take some time to fully savour this time in mine and Eric’s life.

Time for more moments of joy relaxing together!

I’ve never been great at relaxing; I’m always moving from one task to the next to reach my goals. But I think it is time to work on it – having hustle is a skill but so is being able to truly chill out! Maybe more time to think and relax will end up in more blog posts like this, where I can spill my thoughts onto a page and move ahead with a clear mind. I hope so, writing this has been very relaxing!

Now I’m off to find my moments of joy – I hope you are finding yours too, wherever life is taking you right now 🙂 More blog posts ahead, thanks for reading!

Master Bedroom Dresser Upgrade and Kitchen Renovation Update

Hi everyone! Sorry it has been a while, I have been very busy with work, travelling, and life! I’m working on lots of projects; but don’t worry, I have been taking lots of pictures as I go and will be writing posts as I find time!

Before I get into how I have upgraded the dresser in my master bedroom I wanted to let you know about a very exciting project I got started on my few last time offs – my long awaited, highly anticipated, kitchen renovation! Eric and I had a structural engineer perform a site visit to evaluate our options for wall removal on our main floor to expand the kitchen footprint. Out of the 3 walls we want to remove only one is load bearing; and it will be able to be removed without having to put up bulkheads or pillars. One of the other 2 walls we are actually removing on our own during this time off – the wall between the dining room and the office room that will become part of the kitchen. Eric and I are so excited to remove that wall (although he was a bit apprehensive about letting me near a sledgehammer)! Now that we have our structural answers we can start to plan the kitchen renovation and I can’t wait to update you as we go!

DSC_4601
The wall we are demolishing looking from the living room. I’m really sad to see my beloved plate wall go, but I know that getting rid of this wall will really help with the flow of my main floor!
DSC_4602
The wall we are demolishing looking from the office room that will later become part of the kitchen. So long storage, hello open concept!

Now on to the dresser upgrade! As I have mentioned before my master bedroom has one rather small closet so I have been very conscious of adding storage space; once our family expands all of Eric’s and my clothes will need to be in the master bedroom. So far for storage we have two nightstands with two drawers each, four large drawers in our bed frame, a storage bench at the foot of the bed (which also acts as a step so Newton can easily jump onto our bed), and a small four drawer wooden dresser. This dresser was Eric’s when he was a student and is a good solid piece of furniture; but for two of us it is just not enough storage – right now it only has his clothes in it! I also want more surface space so I can add some more style to our master bedroom.

DSC_4394
Before: Definitely lacking in storage capacity and doesn’t really match the room. It’s going to be moved into the guest room where it will suit the decor much more!

Eric agreed it was time for an upgrade (after I bugged him for a while!) so I happily dived into researching dressers. There I had the unpleasant discovery that dressers are surprisingly expensive, especially the ones I had in mind. So I turned to Ikea to find a dresser that was affordable and large enough for Eric and I. Since I wanted 8 drawers I settled on the Hemnes from Ikea in the dark brown finish to match the other furniture in the room (HEMNES 8-drawer dresser, black-brown $299.00). I did hope to mix and match the finishes in this room but sadly our hardwood floors make that very difficult since they have an almost orange undertone to them. This dresser comes in 3 large flat packed boxes and is definitely a time sucker to assemble. Eric and I have put together tons of Ikea furniture and anything with drawers is usually very tough. Sure enough, with 8 drawers, a long length, and hundreds of parts this behemoth took us two full nights to assemble together. When it was done it looked great but a little plain, especially the knobs.

DSC_4581
Fully assembled dresser – the knobs were too plain for me and I knew I could make this dresser mine by simply changing the knobs!

So I decided to use my usual trick of buying some beautiful knobs at Anthropologie, one of my favourite stores. This was the approach I took with my master bedroom nightstands and my sofa table drawers, and it is a touch that people always comment on. Plus I am a very tactile decorator and I get a lot of pleasure from using beautifully crafted hardware! Is that weird? Probably! Anyways, with Eric in tow and my colour palette in mind (light and dark teal and blues, to match my duvet cover) I eagerly began scouring the gorgeous knobs and hardware section of Anthropologie…and came up empty 😦 Nothing they had fit my colour scheme, and even the neutrals weren’t cutting it for me. This was a first for me – I left Anthro empty handed. But I never give up so as soon as I got home I began scouring the internet for my knobs – and found them (surprisingly) on Amazon.ca (Sky Blue Fluted Ceramic Knobs)! It was around $70 (with shipping) for 12 of the prettiest light blue ceramic knobs with silver hardware – far cheaper than 12 knobs from Anthropologie but with just as much style!

Sky Blue Fluted Ceramic Cabinet Knobs
New knobs for the Ikea dresser from Amazon.ca – $70 for 12!

Once I installed the knobs (so easy and quick!) I loved the dresser much more! Eric and I then moved it into our master bedroom and filled the drawers. One of the best things about Ikea furniture is all the accessories they carry for each piece – in this case, they sell collapsible drawer boxes so you can fully organize and customise your dresser drawers. I bought two sets of Skubb boxes (6 boxes in each set for $9.99 per set) so that Eric and I could make our clothes fit in the drawers exactly how we want them.

DSC_4586
Skubb collapsible drawer boxes for organizing dresser drawers.

The last step was for me to style the surface of the dresser, for which I used decor I already had. It is amazing how much this has improved the function and look of my master bedroom!

DSC_4604
The Hemnes dresser from Ikea with sky blue ceramic knobs – now my dresser matches my storage needs and the aesthetic of the master bedroom!

With this dresser I am almost done this room – the last step will be to paint the walls a very light grey to create the serene retreat I have been craving! I can’t wait to paint over that ugly green for good!

I hope you enjoyed reading about my dresser project and I hope to post again soon about some other projects I am working on! Until then, enjoy your summer!

Cooking: Roasted Radishes – A Perfect Veggie Side Dish for Spring!

Hi everyone! I know I said yesterday I wouldn’t be blogging again until I came home from work in two weeks, but it turns out that there is a blizzard at the mine today so I won’t be flying there until tomorrow. Today I have been relaxing (and going through my work email) at my hotel, it is nice to get a very quiet day off! I find when I am at home I am always on the go because there are projects for me to do everywhere. Since I have some quiet downtime I figured I would write up a quick recipe post 🙂

Last week I tried a new recipe for roasted radishes, and they were so good and easy I just had to share! I love radishes but have only ever had them raw in salads and veggie trays. This recipe only requires 4 ingredients and is very simple to make. The resulting roasted radishes are fantastic – they taste peppery and sweet and this will definitely be a recipe I make again!

DSC_4411
Roasted radishes: The perfect veggie side dish for spring!

My husband Eric was busy judging beers for 3 nights last week after he finished work so I was on my own for supper. Usually when this happens I go through the random pantry items I have hanging around and make something to use them up. I had some mashed potatoes and shake n bake chicken breading that needed to be used  but I wanted a tasty veggie side dish to spice up the somewhat plain meal. When going through the various blogs I read I found this recipe on Toronto blog Living Lou for roasted radishes: http://www.livinglou.com/2016/04/how-to-roast-radishes.html.

To make roasted radishes all you need is the following:

  • 1 bunch of radishes
  • 1 tbsp. extra virgin olive oil
  • 1/2 tsp. sea salt
  • Freshly cracked pepper to taste
DSC_4400
These four simple ingredients are all you need to make roasted radishes.

To make the roasted radishes start by preheating the oven to 450°F. Next, wash the radishes and slice off the stalks and any blemishes. Cut each radish into quarters and place them into a medium bowl. Toss them with the olive oil, salt, and pepper. Then place the radishes on a large baking sheet and roast for 15-20 mins, stirring halfway through the cooking time.

DSC_4408

Serve the roasted radishes immediately and enjoy! As seen below, the radishes caramelize beautifully and turn a lovely light pink colour. Probably one of the prettiest and tastiest veggie side dishes I have made, and it is very easy too!

DSC_4411
Roasted radishes, ready to eat!
DSC_4417
These roasted radishes immediately perked up my rather tame pantry leftover dinner! This recipe is definitely a keeper!

I hope you will give these roasted radishes a try and that you are all enjoying the lovely spring weather! I have a hot date with the cold Arctic starting tomorrow, but I will be back in two weeks with more cooking, baking, decorating and fashion posts – I’ve got so many posts planned!

Wardrobe Rehab: Phase 1 – The Purge!

Have you ever stood in front of your closet feeling like you have nothing to wear, even though you clearly have a ton of clothes? Or you just wear or buy the same few things over and over? *Rebecca raises her hand sheepishly* Then it is probably time for you to do a wardrobe rehab!

I started my wardrobe rehab last week and I have completed the first phase which is purging the unwanted items (I have also started on the second phase which is filling the wardrobe gaps, more details to come on that). I put a fair bit of time and thought into it, so I thought I would share my process and some good tips. I know for many people (including me!) going through their wardrobe is a big task that can be difficult due to emotional attachment to your clothes as well as fear of getting rid of things you paid good money for.

My motivation to perform a wardrobe rehab comes from several things:

  1. Lack of closet space: Sadly my master bedroom only has one very small closet. So when we moved into the house I told Eric he could have that closet and I would take over the small bedroom next to it with my clothing. That room came with shelving and plenty of hanging storage so I happily put my clothes in there and was quite thrilled with how much room I now had for my wardrobe. Fast forward to today, where my clothing has gotten out of control simply because I have tons of space for it…for now. The top floor of my house has three bedrooms: The master bedroom, my current closet/craft room, and the guest bedroom. Obviously at some point if we have kids I will not be able to keep this room for all my clothes so it is time to reduce the size of my wardrobe.
  2. Too many items:  My closet room is now very full, and sadly it is full of items that I rarely wear. This is wasteful and it makes it hard to see what I have properly.
  3. Stuck in a style rut: The last few months I have felt like I was just wearing the same things over and over in the same ways. Sure it was winter, but that is no reason to feel so stuck fashion wise!
  4. Not enough classic pieces: I had a sense that I had many trendy pieces but I was lacking foundational classic pieces -this became very clear once my purge was complete! Getting rid of the unwanted items made it very easy to determine what I would need to rehab my wardrobe.
DSC_4391
My wardrobe before the purge – it was very full and hard to see what I had! By the way, this room is in it’s original state from when I moved in – that awful green colour is all over the house and I am slowly working at getting rid of it room by room!
DSC_4390
Another shot before the wardrobe purge; some of these items haven’t been worn since I bought the house two years ago…

I completed my wardrobe purge over several days in manageable chunks. The first day I did all my outerwear, footwear, socks, and intimates. These items are located in the master bedroom and guest room closet and were pretty easy to pare down. The next day I did all my bottoms, jewelry, and items on the shelves (sweaters and shorts). By the third day I had a sizeable pile of items I had purged and it inspired my husband Eric to join in! I had him help me with the hard items – my huge collection of tops and dresses. Then I helped him purge his wardrobe.

Tips for wardrobe purging:

  • If possible have a close friend/partner/family member around so you can try on things for them and get their thoughts. I did the hardest parts of my wardrobe purge with Eric around and it really helped me out – he had a lot of insight and was good at helping me to let go of things that just didn’t work for me anymore.
  • When deciding to purge something always ask yourself the following questions: Is it comfortable? Does it fit? Is it something I will wear again? If the answer was no to any of these questions I would purge the item.
  • Donate the purged items that are in good shape; I tend to donate to Value Village since they give you coupons for your next purchase (and you all know how much I love thrifting!)
  • While going through your wardrobe take the time to try on each piece; this will give you a much better idea if it is something that you should purge or not.
  • Examine all your pieces to check if they need any repair, alterations, or cleaning – now is the time to get the items you will keep in top shape so you actually wear them!
  • While purging be thinking about what your style is; knowing what direction you want or need your wardrobe to go in will help you sort out what you need to keep (or buy!) to get it there.

Once I finished purging my wardrobe I had two entirely filled garbage bags to donate! It was frightening how much I had held onto for no reason. Eric also had two entirely filled garbage bags to donate from his wardrobe. Since the items were in good shape I donated them to Value Village.

DSC_4471
My pile of purged items entirely filled two whole garbage bags!

The hardest items for me (and Eric) to purge were the sentimental ones – university event t-shirts and other t-shirts from our travels. We weren’t wearing these items anymore, just storing them all over our valuable closet spaces. What we decided was that we could have one small box for items we just couldn’t part with yet, which I am now calling the Sentimental Box (patent pending lol). We were able to get rid of all the less sentimental items with ease once we decided we could only have one box worth of those kinds of clothes.

The single most difficult item I purged was my university graduation ball dress; it had a lot of sentimental value, cost a fair bit when I bought it, and it still fit me. But I realized I would never have an occasion to wear it again, and even if I did somehow have an event to wear it to it wasn’t my style anymore and didn’t fit perfectly. Plus I recalled finding my high school prom dress at a thrift store and realized I could be giving it to someone who really needed it. So I donated it to Value Village with the rest of my purged items after trying it on one last time.

DSC_4467
My university graduation ball dress was the most difficult item to purge from my wardrobe; I hope that someone who needs it will give it another time to shine!

Once I was done with my wardrobe purge it felt pretty good – I could now easily see what I had and I had more space free. This allowed me to display my purses so I can switch between them easier (plus it looks so much cuter!). Doing the purge told me I had a ton of patterned pieces, but very few neutral foundational pieces. Also I only had two pairs of pants, but 20 tops! This helped me to form a wardrobe shopping list, along with a few articles online about the classic pieces a woman’s wardrobe should have (spoiler alert: I’m missing most of them lol). I then moved into Phase 2 of my wardrobe rehab: the rebuliding. As you can imagine, this step involves a lot of shopping and I will be writing about it in Part 2 of my wardrobe rehab post so stay tuned!

DSC_4489
My wardrobe after completing my purge – it is much more functional and easy to see what I have!

I hope that this post has inspired you to do your own wardrobe purge, and if you do a wardrobe purge let me know how it goes! Time for me to head back up to work, I will have more blog posts when I get back home in two weeks!


Cooking: Maple Granola

Happy (almost) spring everyone! It’s finally starting to warm up and I have been so busy since I came back from work last week – lots of big projects I have been working on and will be posting about soon (home decor and fashion related)! I have also been cooking up a storm lately and I thought I would share a great new recipe I found for maple granola with you all.

So a confession; breakfast is my favourite meal of the day! Sadly I don’t eat eggs and so I find it hard to find a tasty, filling breakfast that is easy to prepare, especially on weekdays. However, I was reading my favourite home decor blog (The Inspired Room at http://theinspiredroom.net/) and came across a very simple recipe for homemade maple granola. You can make it ahead of time in big batches and it keeps for weeks in an airtight container; this really works for me and Eric since we are always in a rush on weekday mornings (him to head to work, me to watch Ellen lol). The maple granola turned out to be very good and perfect to use with yogurt, fresh fruits, or milk. I also think I may use it in the future to mix with nuts and dry fruit as a tasty trail mix snack!

DSC_4466.JPG
Maple granola breakfast bowl: I added shredded coconut, Greek yogurt, sliced banana, and dried cranberries to the granola – so tasty and satisfying!

Here is the recipe I used from the Inspired Room blog: http://theinspiredroom.net/2016/03/25/coconut-oil-and-maple-granola-recipe/. I ended up doubling the recipe which provided a week’s worth of granola for Eric and I. All you need for this recipe is:

  • 2 cups rolled oats
  • 1 tbsp. chia seeds
  • 1/3 cup raw pumpkin seeds
  • 1/4 cup melted coconut oil (protip: for cheaper coconut oil head to the international foods section since that is where all the non-hipster coconut oil hangs out; my jar was only $2.50 and will last for at least two double batches of this recipe)
  • 1/3 cup maple syrup
  • 1/2 tsp. cinnamon
  • 1/4 tsp. sea salt.
DSC_4418.JPG
Everything you need to make delicious homemade granola.

To make the maple granola start by preheating your oven to 300°F and lining a large baking sheet with parchment paper (if you are doing a double batch line two baking sheets). In a large bowl stir together the following dry ingredients: rolled oats, pumpkin seeds, and chia seeds. In a medium bowl combine the coconut oil, maple syrup, sea salt, and cinnamon. Next, combine the contents of the medium bowl with the contents of the large bowl. Then spread the mixture evenly on the baking sheet. Bake for 20 minutes then give the granola a stir and bake for another 15 minutes (or until the granola is golden brown). Remove from the oven and let the granola cool before storing it in an airtight container.

DSC_4426.JPG

DSC_4434.JPG
Granola for days! Bonus, baking this will make your home smell delicious!

My favourite thing about this granola is how filling it is – I wasn’t hungry until way after my usual lunch hour. Eric said the same thing so this recipe is a winner! Also it is nice to eat something so real without any preservatives or loaded with sugar. Finally, this recipe is super easy and something you can just toss in the oven while you do something else nearby. I hope you will give it a try and let me know what you think.

Happy weekend everyone; I hope you will all enjoy the amazing weather that has finally arrived!

DSC_4463
Now that’s a perfect weekday breakfast: Easy and quick to make, tasty, and very satisfying!

Cooking: Crispy Potato Nests Poutine with Tikka Masala Gravy

When I’m out and about with Eric at bars on the weekend we always crave the snack food bars sell – poutine, nachos, fries, etc. These are all delicious fried foods that can be tricky to make at home. But last weekend I think I finally cracked the code on how to make amazing, easy to make bar food at home – so today I will be going over my recipe for my decadent crispy potato nests poutine with tikka masala gravy!!! Warning: This is not a healthy recipe and it is almost too easy to make!

Last weekend Eric and I had his cousin and her husband over for a night of hanging out and delicious food. I decided we would need an excellent barfood inspired snack to keep us going long into the night. We did all the prep work in advance so it would be easy (even after a few drinks) to put the poutines together. However; we all ate so much at Rodeo Brazilian Steakhouse that night (http://www.rodeobraziliansteakhouse.com/, it was amazing food that I will crave for months to come) that we didn’t eat the poutine until the next day. And by eat it the next day I mean that instead of the hashbrowns I planned we ate tikka masala poutine for breakfast (it was delightfully naughty)!

DSC_4266
Crispy potato nests poutine with tikka masala gravy – even just looking at this picture makes me want to make it again!

This poutine is mouthwatering and decadent – it has a base of crispy potato nests smothered with a flavorful tikka masala gravy and squeaky, melty, cheese curds. We also topped the poutines with fresh cilantro. It is definitely one of the tastiest dishes we have ever made at home – if Eric and I ever do open a brewpub or bar this would go on the menu for sure!

I’m going to start with discussing the crispy potato nests. I was inspired to try this recipe when I was watching the show Giada Entertains (Food Network) where she made thin, curly, crispy fries using a sprializer. The recipe is this one: (http://www.foodnetwork.com/recipes/giada-de-laurentiis/crispy-potato-nests-with-cherry-ketchup.html?soc=socialsharingpinterest), but I omitted making the cherry ketchup and adding cinnamon to my potato nests.

The specialized equipment you need for this recipe is a deep fry thermometer (or candy thermometer) and a sprializer. However, I think this recipe could be done without a spiralizer if you are going for more of a regular french fry shape and if you have the patience to cut the potatoes. Definitely the skinnier your potatoes are cut the crispier they will get when you fry them. We used a thermapen thermometer that Eric has for brewing and it was perfect for this since it has an instant digital readout (http://www.thermoworks.com/products/thermapen/). Ingredient wise this is an amazingly simple recipe: Russet potatoes, vegetable oil (enough to fill your pot 3 inches deep), and salt.

DSC_4357
What you need to make crispy potato nests at home (not pictured, deep fry thermometer)

To make the potato nests first heat the oil in a pot over medium-high heat until it reaches 350°F on the deep fry thermometer. Please be careful when working with the hot oil and keep in mind that many insurance policies don’t cover fires caused by deep frying. Next, using the medium-thick blade on a spiralizer, cut the potatoes into thin spirals. We actually spiralized the potatoes in advance, just remember to store the spiralized potatoes in water so they don’t turn black due to oxidation.

DSC_4262
Frying the potato nests

In small batches fry the potatoes, turning them as needed so they brown and crisp up evenly. They are done when they are lightly golden and crispy, which takes about 1 to 2 minutes. Remove the potato nests to a paper towel-lined plate, dab gently with paper towels to remove excess oil, and then sprinkle with salt to taste. Serve immediately. Ensure the oil is always above 350°F before you put in more batches of potatoes; otherwise your temperature may be too low and your potatoes will not fry.

DSC_4263
Be sure to dab the excess oil off and sprinkle with salt

These fries were amazing and I can definitely see Eric and I making them again; they were crispy and tasted like fries you would get at an upscale bar. They were also very easy to make! They were excellent on their own and definitely did not need to be made into poutine…but I had a recipe for tikka masala gravy to put on fries that was begging to be part of a poutine!

One of our most unique wedding gifts was a subscription to a spice of the month club called Spice Post. Spice Post sends you two spice mixes a month along with several recipes that use the spice mixes. We have loved discovering new flavours and recipes, and this recipe for tikka masala gravy is probably our favourite one yet! Best of all, you don’t need to have the Spice Post tikka masala spice mix we used – any tikka masala spice mix will work in this recipe.

DSC_4362
Spice Post tikka masala spice mix and recipe card

To make the tikka masala gravy you will need:

  • vegetable oil
  • 1 large chopped onion
  • 1 minced chili (if you want to add some heat)
  • 2 tsp. flour
  • 2 tbsp. tikka masala spice mix (our mix was from Spice Post but other mixes would work well too)
  • 8 oz. chicken stock
  • 8 oz. coconut milk
  • Juice of half a lemon
  • 4 tbsp. finely chopped fresh cilantro (chop extra if you will want to sprinkle some on top of the poutine)

Heat the oil in a pan then brown the chopped onion and the minced chili until they are soft and golden. Add flour and tikka masala spice mix to the pan, warming until fragrant. Next, add chicken stock and coconut milk to the pan. Bring to a simmer and cook for 5 to 10 minutes, stirring frequently. Don’t cook for too long or the gravy will be too thick. Finally, stir in cilantro leaves and finish making the sauce by adding the lemon juice.

DSC_4363
The recipe card for the Spice Post tikka masala spice mix; we made the chips and curry sauce for our poutines

The tikka masala gravy was fairly easy to make and we made it in advance. It is very rich, flavourful, and sure to be a crowd pleaser!

To assemble the poutines simply place a layer of potato nests on small plates, sprinkle with cheese curds, spoon on a generous amount of tikka masala gravy on top, and then finish by sprinkling some finely chopped cilantro leaves on top.

I hope I have inspired you to try making fries and poutine at home; it was much easier and tastier than I ever imagined it would be! Enjoy, and as always let me know if you make this recipe or have any questions!

DSC_4266
Crispy potato nests poutine with tikka masala gravy – drool worthy!
IMG_6126
The tikka masala gravy is also perfect for dipping!

Decorating for Easter

Growing up I always loved how my mom would decorate for each holiday – in particular she would add decorations to a massive flowerpot on the front porch and put up a new wreath on the front door. So once I got my own house I knew I would want to start that tradition too! I now have a little collection of decor pieces I put up for some holidays (Christmas, Easter, Valentines Day, and Halloween). I slowly add things to my collection as I find them; a great time to get decor is directly after the holiday when things go on clearance.

Easter has to be one of my favourite holidays – candy and chocolate are one of my biggest food weaknesses and Easter also comes with the freshness and new possibilities of spring! This year I have two main Easter decor pieces; a centrepiece with adorable painted Easter eggs and ceramic bunnies and my front porch cast iron urns filled with moss and Easter egg covered branches. These two decor pieces combined with putting away some of my more cozy, winterlike pieces and adding some more springlike items make a big difference in the feeling of the house!

The centrepiece sits on my dining room table on top of my bohemian inspired table runner that my mom made out of leftover fabric from reupholstering my thrift store dining room chairs. My favourite thing about the runner (besides the gorgeous, youthful pattern) is that it is made out of outdoor fabric so I never worry about getting it dirty since it wipes clean so easily.

DSC_4337
My Easter centrepiece on my dining room table

The bowl I use for my Easter centrepiece is actually a serving bowl that I use when entertaining a big crowd. But it’s beautiful curves, asymmetric shape, and large size make it perfect to use for centrepieces! I got the bowl at Loblaws in the Presidents Choice kitchen department two years ago; and I noticed last time I was there that they still sell them.

DSC_4330
My dining room table and plate wall; the plate wall is one of my all time favourite decorating projects I have done so far!

The spheres made out of vines in the centrepiece came from Homesense; they were packaged with little orange pumpkins that I put out in the fall. I use the vine spheres quite a bit now – so far I have put the little pumpkins with them, vintage Christmas tree balls from my grandma (they always make me remember Christmas dinners at her apartment), red hearts (for Valentines), and now the Easter eggs. The spheres have looked great with everything I have put with them so far so I highly recommend having a neutral piece like them around for decor! I regularly see items like this at Homesense; I think mine came to $12 for the box.

DSC_4339
Spheres made of vines – so much beautiful natural texture!

The painted Easter eggs for the centrepiece all came from Dollarama last year; I bought 3 packs of eggs at $2 a pack – what a deal! They came with ribbons on them, so I have the option of hanging them if I want. They have similar Easter eggs at Dollarama this year.

DSC_4338

Finally, my two ceramic bunnies came from Homesense last year; I got them on clearance after Easter for $3 each!

DSC_4336

DSC_4329

The cast iron urns sit on my front porch, usually flanking my front door. I dress them up for each season and I love their classic look. The only drawback of them is that they are really heavy; when it is cold and I want to change them around it is a lot of heavy lifting to bring them inside the house!

DSC_4305
One of the cast iron urns on my front porch filled with moss and Easter egg covered branches

DSC_4311

The branches in the urns came from Ikea – they are wires covered in a pearlescent plastic coating that is extremely weather resistant and durable. They were not cheap; each branch was around $20 with tax and I used 4 of them (2 per urn). However; I use the branches from late fall until early spring with my urns so this saves me a lot over the long term instead of using live foliage with every season. I just shove them into the potting soil in the urns and despite some very strong winds they have never budged. For the winter I sometimes left the branches bare, and around Christmas I tied ornaments onto the branches (plastic ones that looked real so that I didn’t have to worry about them breaking). Next year I may put twinkle lights on the branches!

The little pastel Easter eggs came from a dollar store (not Dollarama, they only had the bigger plastic eggs when I was there). I bought two packs of 12 eggs each for only $3 total. These are the kinds of seasonal decorations I love because they have the three C’s: Cute, cheap, and cheerful!

After sticking the branches into the urns and tightly tying the Easter eggs to the branches I thought the urns looked a little bare. So I decided to add a lush, green bed of moss on top of the potting soil in the urns. I bought the moss at Walmart for $3 for a big bag. So far the only drawback of the moss was that small pieces have a tendency to be blown out of the urns during stormy weather. I have found the moss even in my backyard, but I don’t mind since it is natural and pretty (but I will see if my neighbours say anything; if they do I will do something different next year for sure).

DSC_4287
Making my urns lush with bright green moss!
DSC_4314
The view of my front door when walking up the porch steps; cute and cheerful!

DSC_4304

My front porch is one of my favourite parts of my house; it has lovely bricks in a variety of colours and shapes, shiny black curled metal railings (when we bought the house they were a horrible rusty pink; repainting them was a long chore but so worth it) as well as a cute front door. When we first saw the house the front porch was the feature that made Eric fall head over heels for the house.

The forsythia wreath on the front door I bought at Homesense a few years ago and they have similar ones every year in the spring. I use it from early spring until fall so it really gets a lot of use! It also really pops against the front door. Speaking of the front door, it is currently painted with a matte grey paint that scratches easily and needs a touch up badly. This spring/summer I will be repainting it to make a bold statement so stay tuned for a post on that.

DSC_4317
My front door and cheerful forsythia wreath – it says come on in!

That’s it from me for now; enjoy your St. Patrick’s Day tomorrow and I hope you enjoyed this decorating post as much as I enjoyed writing it!


Baking: Raspberry Lemon Cookies

Since I am doing a lot of entertaining this week I thought it would be fun to make a springlike cookie – so I made 4 dozen raspberry lemon cookies! Lemon cookies always make me think of sunshine and spring, and raspberry plus lemon has got to be one of the best combos out there. These cookies turned out great, and are very tasty and pretty!

Modified.png
Raspberry Lemon Cookies along with one of my adorable ceramic bunnies

For my recipe I looked through all my recipe books at home and couldn’t find the right springlike cookie. I then went browsing for lemon cookie recipes on Pinterest and found the perfect recipe: Raspberry Lemon Cookies by the baking blog Bake.Eat.Repeat (recipe at http://bakeeatrepeat.ca/raspberry-lemon-cookies-recipe/). The ingredients are pretty simple for these cookies; standard cookie dough ingredients plus frozen raspberries and the zest and juice of a lemon. The original recipe was for 24 cookies so I doubled it to make 48 cookies (but ended up with 52 cookies, yay for more cookies!).

DSC_4234
All the ingredients ready to go!

When baking these cookies the most important thing to keep in mind is that the frozen raspberries will thaw really quickly once they are out of the freezer. After taking my ingredients picture I tossed the raspberries right back in the freezer while I put together the rest of the cookie dough ingredients. The raspberries will be the very last ingredient you add to the dough; and once you add the raspberries they begin to melt right away, making this already sticky dough even stickier! This makes it vital that you form your cookies as fast as you can and get them in the oven. While a batch is in the oven refrigerate the remaining dough to ensure your raspberries don’t melt.

DSC_4242
The cookie dough right before adding the raspberries
DSC_4243
Quickly coarsely chopping the frozen raspberries

One thing I would have done differently with this recipe was to not use the frozen raspberries I had opened for breakfast smoothies a while back; they had excess ice which really made my dough sticky! I tried to remove the extra ice as much as I could but some of it definitely made it’s way into my dough.

DSC_4245
Dough ready to be formed into cookies

I was especially excited to bake cookies because I bought a cookie scoop recently and hadn’t tried it yet. After baking my biggest batch of assorted Christmas baking ever in December (over 16 dozen pieces!) I realized I really needed a faster way to scoop dough. I bought the medium sized OXO cookie scoop online from Bed Bath and Beyond (http://www.bedbathandbeyond.ca/store/product/oxo-good-grips-reg-cookie-scoop/102818). It works great and saved me lots of time, plus it makes very uniformly sized cookies which is a big plus for sure!

DSC_4253
Scooping the cookies with my new cookie scoop; I was so excited to finally use it!
DSC_4257
All 52 cookies on the cooling racks
DSC_4272
These cookies are soft, chewy, and have the perfect amounts of raspberry and lemon flavour

DSC_4271

I hope I’ve enticed you to make these great cookies; if you do end up making them please let me know how they turn out!

Do you have a favourite spring baking recipe? Let me know in the comments!